vue2搭建的商品后台管理项目(2)
最新推荐文章于 2023-04-18 11:17:44 发布

奋斗的小泉
 最新推荐文章于 2023-04-18 11:17:44 发布
 阅读量491
 收藏
4
收藏
4
 点赞数
点赞数
最新推荐文章于 2023-04-18 11:17:44 发布
阅读量491
收藏
4

 点赞数
点赞数
vue2-后台管理项目
- 三级联动
- 平台属性业务
- 添加属性与修改属性
- 删除属性:
- spu管理模块介绍
- spuform业务:
- 添加和修改spu
- 删除spu
- skuform业务
- sku详情信息展示业务
- sku模块业务
- 首页
三级联动
静态组件:(因为多个功能需要用到,所以需要注册为全局组件)

需要配置接口获取一级id,二级id,三级id:
//一级分类请求接口
export const reqcategory1Id = () => request({ url: '/admin/product/getCategory1', method: 'get' })


//二级分类请求接口

export const reqcategory2Id = (category1Id) => request({ url: `/admin/product/getCategory2/${category1Id}`, method: 'get' })


//三级分类请求接口

export const reqcategory3Id = (category2Id) => request({ url: `/admin/product/getCategory3/${category2Id}`, method: 'get' })
平台属性业务
静态组件:
        <el-table :data="attrlist" border stripe>
          <el-table-column
            type="index"
            label="序号"
            width="80px"
            align="center"
          >
          </el-table-column>
          <el-table-column prop="attrName" label="属性名称" width="150px">
          </el-table-column>
          <el-table-column prop="prop" label="属性值列表" width="width">
            <template slot-scope="{ row }">
              <el-tag
                v-for="tag in row.attrValueList"
                :key="tag.id"
                style="margin: 0px 10px"
              >
                {{ tag.valueName }}
              </el-tag>
            </template>
          </el-table-column>
          <el-table-column prop="prop" label="操作" width="150px">
            <template slot-scope="{ row }">
              <el-button
                type="warning"
                size="mini"
                icon="el-icon-edit"
                @click="editattrinfovalue(row)"
              ></el-button>
              <el-button
                type="danger"
                size="mini"
                icon="el-icon-delete"
                @click="deleteattrinfo(row)"
              ></el-button>
            </template>
          </el-table-column>
        </el-table>
配置接口动态展示:
//获取商品属性接口
export const reqcategoryattr = (category1Id, category2Id, category3Id) => request({ url: `/admin/product/attrInfoList/${category1Id}/${category2Id}/${category3Id}`, method: 'get' })
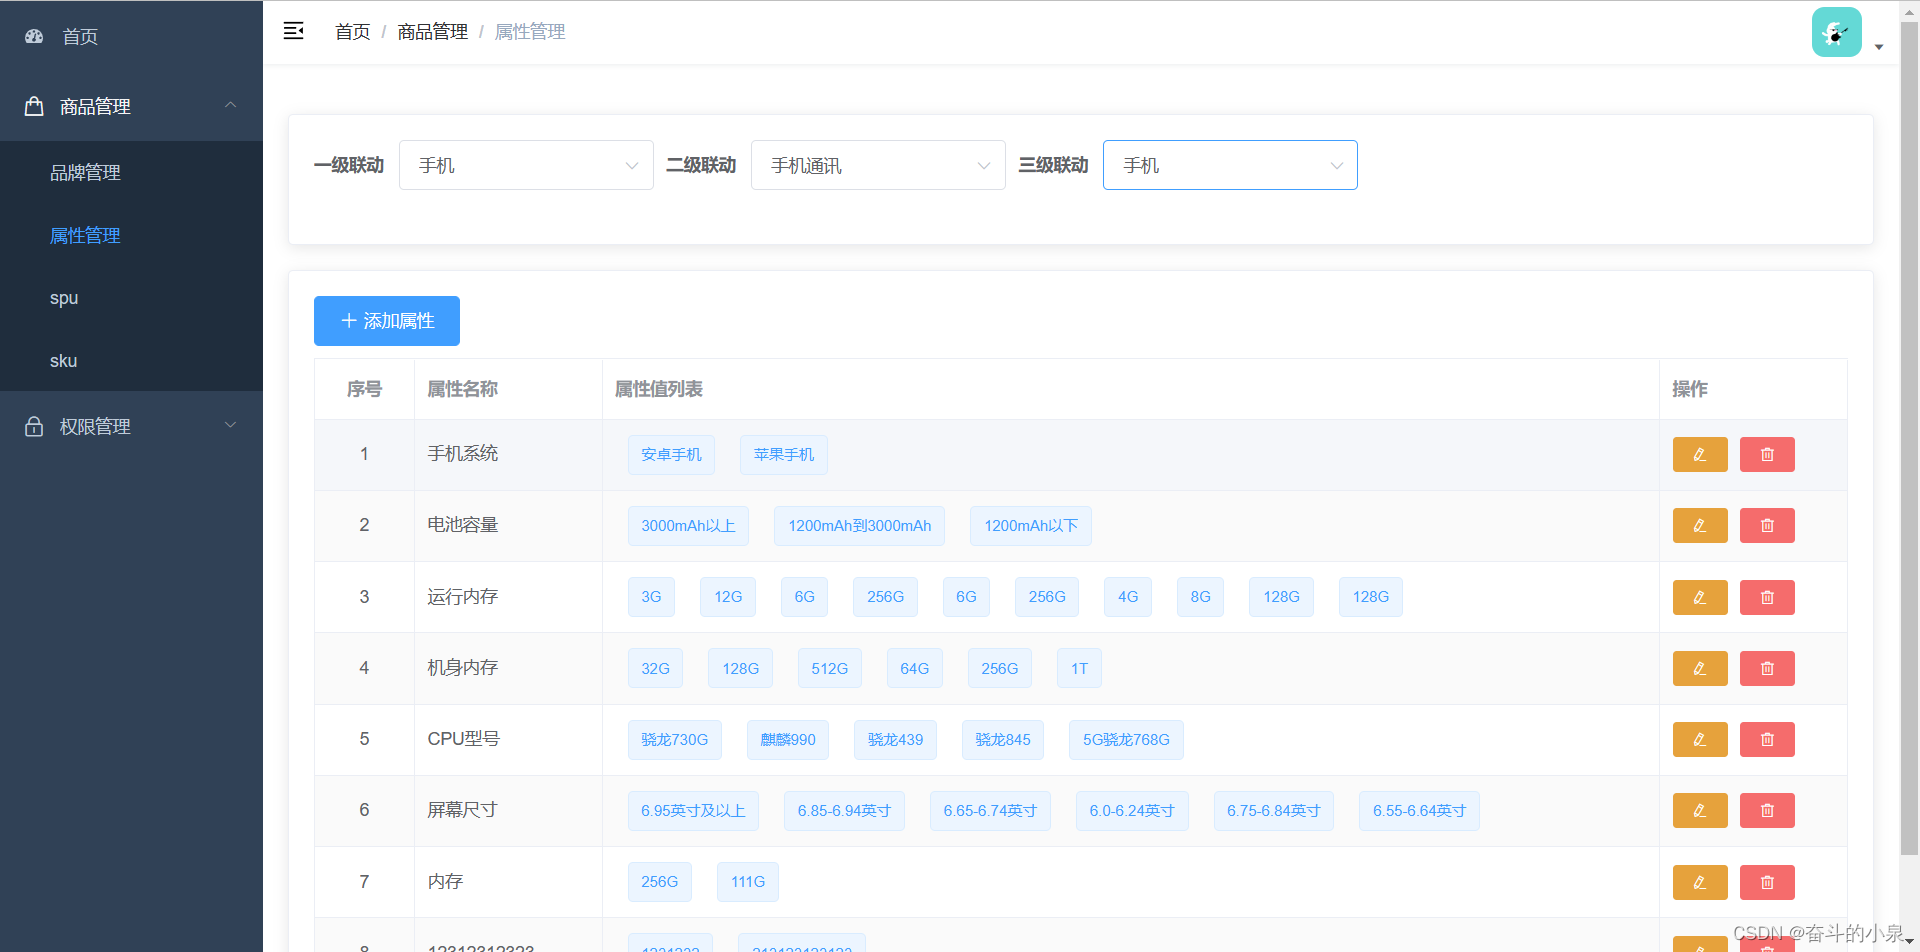
效果图:
添加属性与修改属性
静态属性
 <div v-show="falg">
        <el-form
          ref="form"
          label-width="80px"
          :inline="true"
          size="normal"
          :model="attrinfo"
        >
          <el-form-item label="属性名">
            <el-input
              placeholder="请输入属性名"
              v-model="attrinfo.attrName"
            ></el-input>
          </el-form-item>
        </el-form>
        <el-button
          type="primary"
          size="default"
          icon="el-icon-plus"
          @click="addattrinfo"
          :disabled="!attrinfo.attrName"
          >添加属性值</el-button
        >
        <el-button size="default" @click="falg = !falg"> 取消</el-button>
        <el-table
          :data="attrinfo.attrValueList"
          border
          style="margin: 20px 0px"
          script
        >
          <el-table-column
            type="index"
            label="序号"
            width="80px"
            align="center"
          >
          </el-table-column>
          <el-table-column porp="porp" label="属性值名称" width="width">
            <template slot-scope="{ row }">
              <el-input
                v-model="row.valueName"
                placeholder="请输入属性值名"
                size="mini"
                v-show="!row.value"
                ref="info"
                clearable
                @blur="showtab(row)"
              ></el-input>
              <span
                v-show="row.value"
                @click="showtab(row)"
                style="width: 100%"
                >{{ row.valueName }}</span
              >
            </template>
          </el-table-column>
          <el-table-column porp="porp" label="操作" width="width">
            <template slot-scope="{ $index }">
              <el-button
                type="danger"
                size="default"
                icon="el-icon-delete"
                @click="deleteattrvalueinfo($index)"
              ></el-button>
            </template>
          </el-table-column>
        </el-table>
        <el-button type="primary" size="default" @click="saveattrinfo"
          >保存</el-button
        >
        <el-button size="default" @click="falg = !falg">取消</el-button>
      </div>
接口文件:
//添加属性值接口

export const reqattrinfo = (data) => request({ url: '/admin/product/saveAttrInfo', method: 'post', data })
注意点:
- 控制属性值查看与编辑模式的功能,需要在每条属性值上加入一个属性flag来控制每个属性值的查看与编辑
//添加属性值input
    addattrinfo() {
      const { attrValueList } = this.attrinfo;
      const obj = {
        attrId: undefined,
        valueName: "",
        value: false,
      };
      attrValueList.push(obj);
      //自动聚焦功能的实现
      this.$nextTick(() => {
        this.$refs.info.focus();
      });
    },
- 不能加空值属性值,所以在发送保存请求时需要整理数据
  //保存属性值
    async saveattrinfo() {
      this.falg = !this.falg;
      const { attrinfo } = this;
      attrinfo.attrValueList = attrinfo.attrValueList.filter((item) => {
        if (item.valueName.trim() !== "") {
          return item;
        }
      });
      console.log(attrinfo.attrValueList);
      let result = await this.$API.attr.reqattrinfo(attrinfo);
      if (result.code === 200) {
        this.$message(attrinfo.id ? "修改成功" : "添加成功");
        this.getattrlist();
      } else {
        this.$message(new Error("fail"));
      }
    },
删除属性:
接口文件:
(需要传入id)
//删除属性接口
export const deleteattr = (attrId) => request({ url: `/admin/product/deleteAttr/${attrId}`, method: 'delete' })
静态组件:
 //删除属性
    async deleteattrinfo(row) {
      let result = await this.$API.attr.deleteattr(row.id);
      if (result.code === 200) {
        this.$message("删除成功");
        this.getattrlist();
      }
    },
spu管理模块介绍
该业务:包括三个模块的切换所以用scense属性空值模块的切换 0–表示spu模块 1----spuform模块 2 ----skuform模块
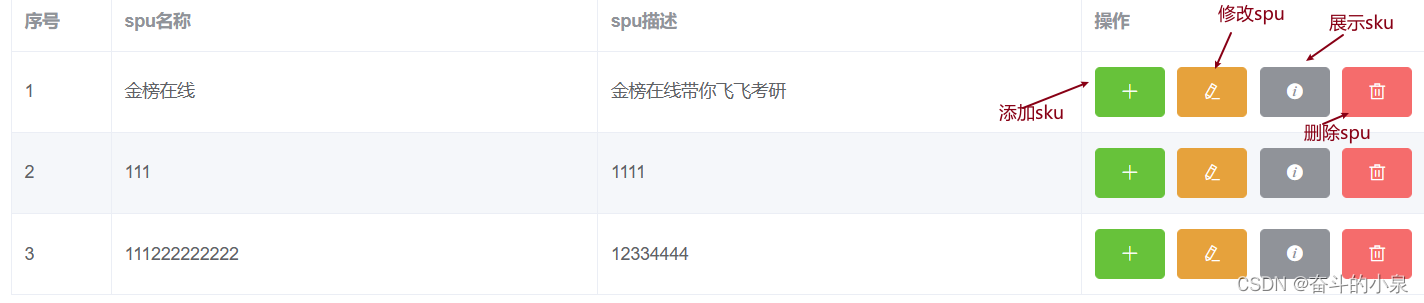
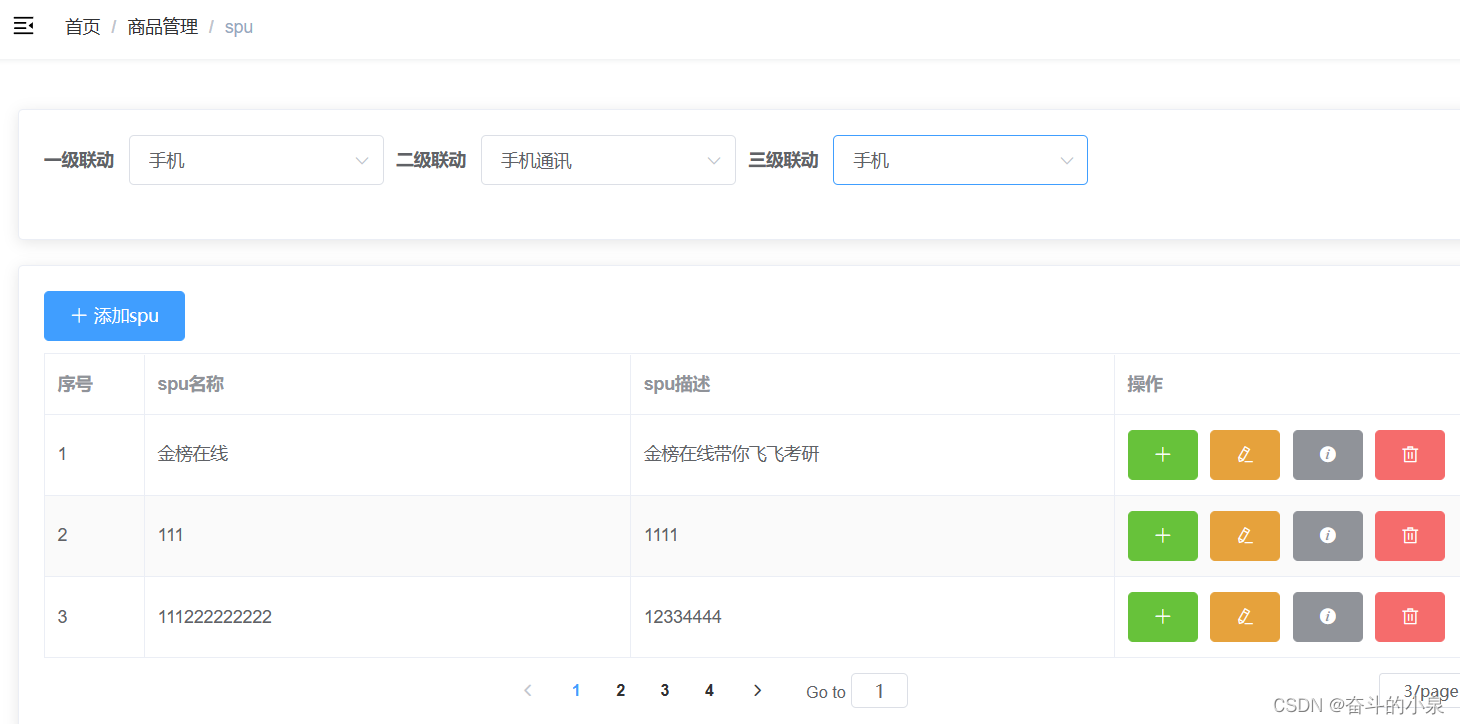
静态组件:

动态展示spu列表:
需要写接口:
//请求spu数据接口
export const getspulist = (page, limit, category3Id) => request({ url: `/admin/product/${page}/${limit}`, method: 'get', params: { category3Id } })
spuform业务:
添加和修改spu
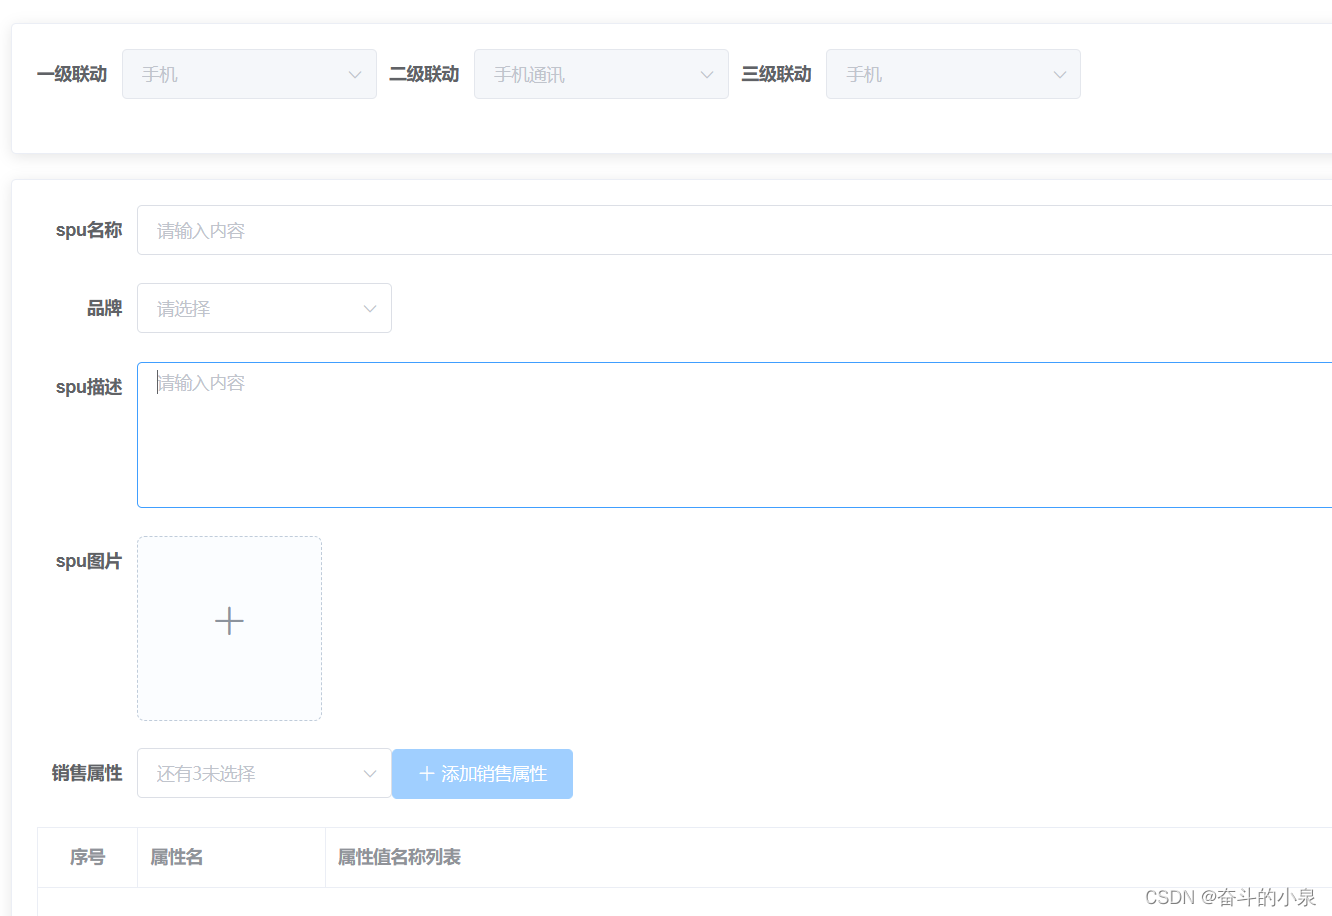
注意点:
- 点击添加spu和修改spu会发请求去获取品牌数据和销售属性
- 照片墙必须要有url,name属性但是服务器发过来的数据没有所以需要处理数据,并且后面添加的数据没有imgUrl,imgName属性,所以最后保存也需要整理数据
//获取spu图片
        let imgurl = await this.$API.spu.getspuimglist(id);
        if (imgurl.code === 200) {
          let list = imgurl.data;
          //由于照片墙需要数组,且数组内必须要有name 、url属性
          list.forEach((item) => {
            item.name = item.imgName;
            item.url = item.imgUrl;
          });
          this.imgurlllist = list;
        }
//保存or修改spu
    async saveorupdatespuinfo() {
      //整里数据图片数据
      this.spuvalueinfo.spuImageList = this.imgurlllist.map((item) => {
        return {
          imgName: item.name,
          imgUrl: (item.response && item.response.data) || item.url,
        };
      });
      let result = await this.$API.spu.savespulist(this.spuvalueinfo);
      if (result.code === 200) {
        this.$message("保存成功");
        this.$emit("changsence", 0);
        //清空修改成功或取消后得残留数据
        this.imgurlllist = [];
        this.spuvalueinfo = {
          //品牌id
          tmId: "",
          category3Id: 0,
          description: "", //spu描述
          spuImageList: [], //spu图片信息
          spuName: "", //spu名称
          spuSaleAttrList: [], //平台销售属性与属性值
        };
      }
    },
重要点:
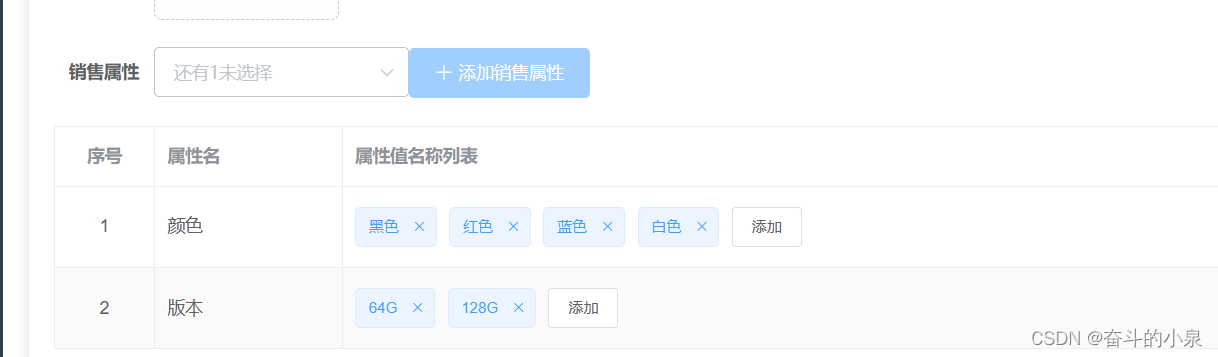
实现销售属性有几个属性未选择:
 unselect() {
      return this.attrlist.filter((item) => {
        return this.spuvalueinfo.spuSaleAttrList.every((item1) => {
          return item.name !== item1.saleAttrName;
        });
      });
    },
删除spu
接口:
//删除spu
export const deletespuinfo = (spuId) => request({ url: `/admin/product/deleteSpu/${spuId}`, method: 'delete' })
    //删除spu回调
    async deletespuinfo(row) {
      let result = await this.$API.spu.deletespuinfo(row.id);
      if (result.code === 200) {
        this.$message("删除成功");
        this.getspudata();
      }
    },
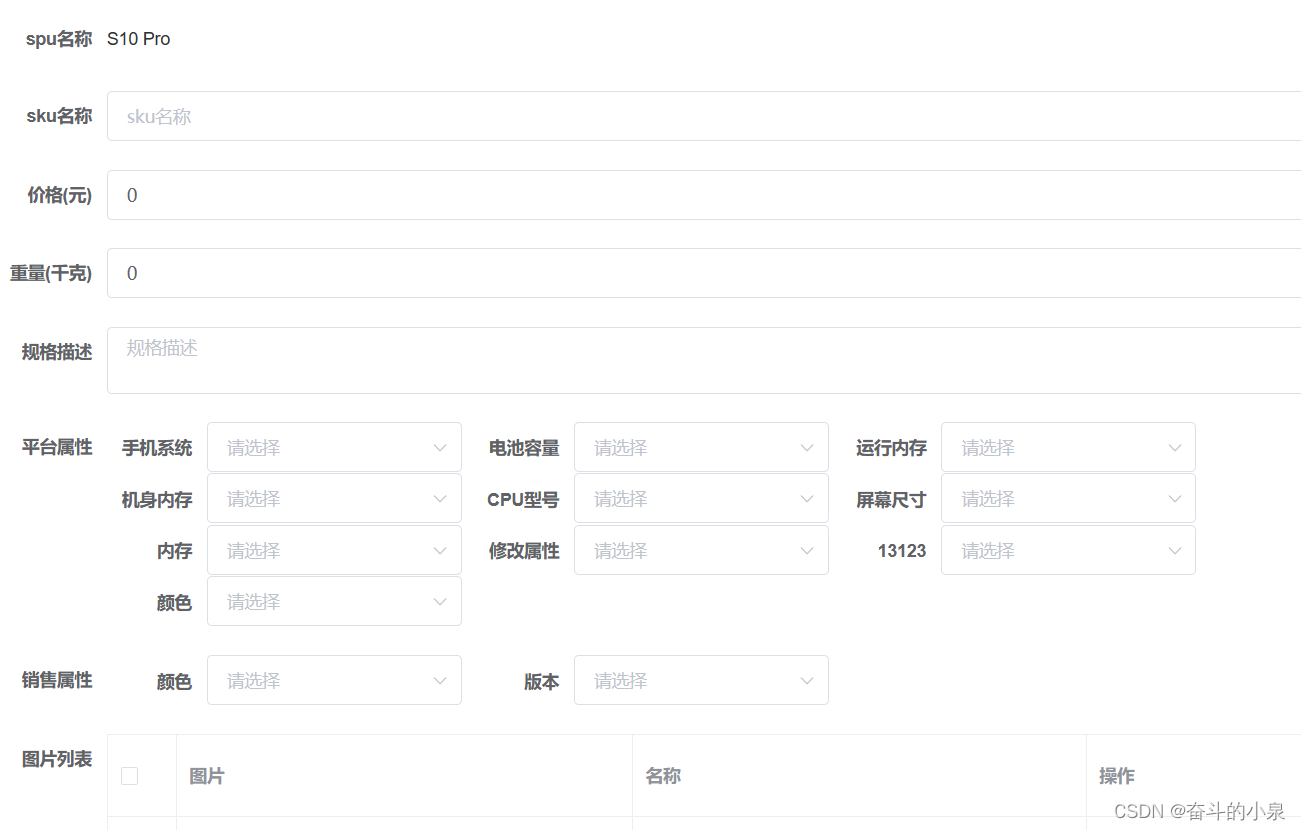
skuform业务
静态组件:
(会发送3个请求去请求图片数据,平台属性数据,销售属性数据 )
接口文件:
//获取图片数据接口
export const getspuimginfo = (spuId) => request({ url: `/admin/product/spuImageList/${spuId}`, method: 'get' })
//获取销售属性数据
export const getspuVauleinfo = (spuId) => request({ url: `/admin/product/spuSaleAttrList/${spuId}`, method: 'get' })
//获取商品基础信息
export const getmarkinfo = (category1Id, category2Id, category3Id) => request({ url: `/admin/product/attrInfoList/${category1Id}/${category2Id}/${category3Id}`, method: 'get' })
注意:保存数据发送请求需要整理数据
async savesubmit() {
      //整理平台属性id
      //第一种写法
      // let arr = [];
      // this.baseAttrValueList.forEach((item) => {
      //   if (item.attrpintaiid) {
      //     const [attrId, valueId] = item.attrpintaiid.split(":");
      //     console.log(attrId, valueId);
      //     let obj = {
      //       attrId,
      //       valueId,
      //     };
      //     arr.push(obj);
      //   }
      //   //将处理好的数据push进列表
      //   this.skuinfo.skuAttrValueList = arr;
      // });
      //第二种写法 reduce
      this.skuinfo.skuAttrValueList = this.baseAttrValueList.reduce(
        (prev, item) => {
          if (item.attrpintaiid) {
            const [attrId, valueId] = item.attrpintaiid.split(":");
            prev.push({ attrId, valueId });
          }
          return prev;
        },
        []
      );
      //整理销售属性
      this.skuinfo.skuSaleAttrValueList = this.basevaluelist.reduce(
        (prev, item) => {
          if (item.attrid) {
            const [saleAttrId, saleAttrValueId] = item.attrid.split(":");
            prev.push({ saleAttrId, saleAttrValueId });
          }
          return prev;
        },
        []
      );
      //整理图片数据
      this.skuinfo.skuImageList = this.imagellist.map((item) => {
        return {
          imgName: item.imgName,
          imgUrl: item.imgUrl,
          isDefault: item.isDefault,
          spuImgId: item.id,
        };
      });
      //发请求
      let result = await this.$API.spu.saveskuinfo(this.skuinfo);
      if (result.code === 200) {
        this.$message("添加sku成功");
        this.$emit("changsence", 0);
      }
    },
图片列表的默认图片功能:(排他思想)
//处理默认图标的显示与隐藏
    handleshow(row) {
      this.baseImageList.forEach((item) => {
        if (item.id !== row.id) {
          item.isDefault = 0;
        }
      });
      row.isDefault = 1;
      this.skuinfo.skuDefaultImg = row.imgUrl;
    },
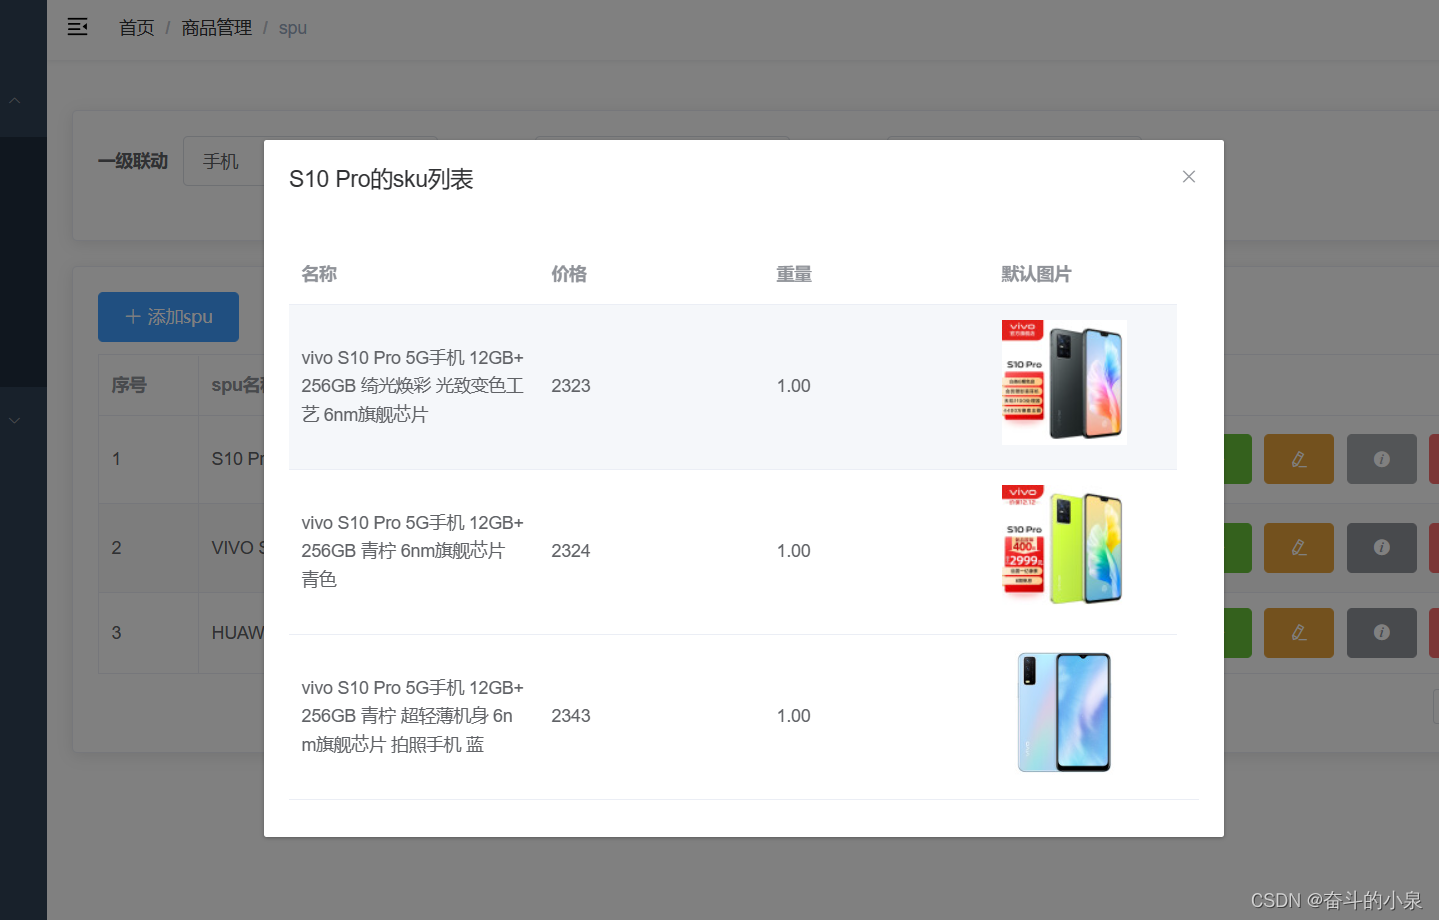
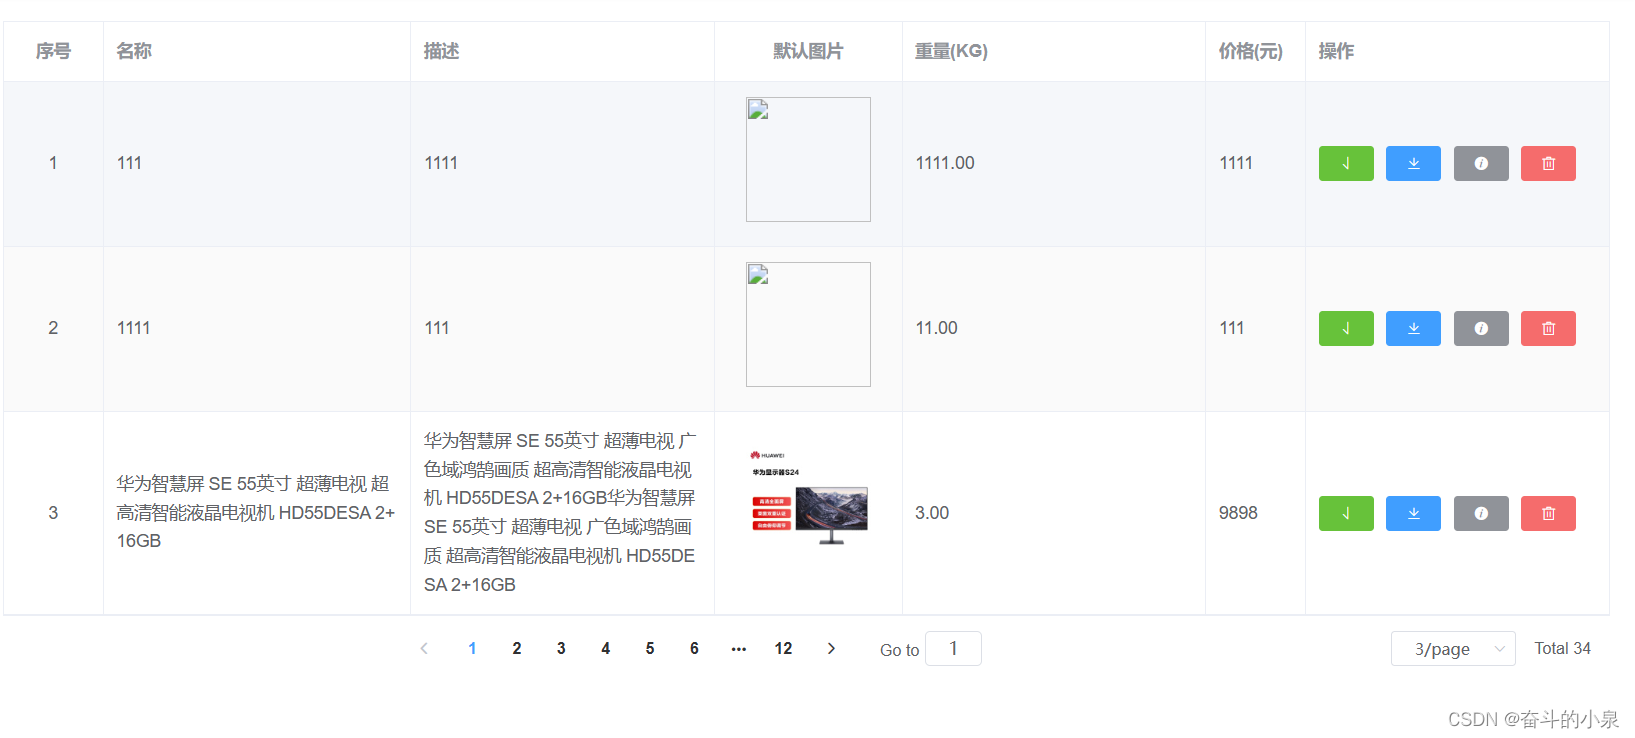
sku详情信息展示业务
效果图:
//请求sku列表数据
export const reqskulistinfo = (spuId) => request({ url: `/admin/product/findBySpuId/${spuId}`, method: 'get' })
静态展示用的时dialog组件:
        <el-dialog
          :title="`${spuName}的sku列表`"
          :visible.sync="dialogTableVisible"
        >
          <el-table v-loading="loading" :data="skuinfolist">
            <el-table-column
              property="skuName"
              label="名称"
              width="200"
            ></el-table-column>
            <el-table-column
              property="price"
              label="价格"
              width="180"
            ></el-table-column>
            <el-table-column
              property="weight"
              label="重量"
              width="180"
            ></el-table-column>
            <el-table-column property="prop" label="默认图片" width="150">
              <template slot-scope="{ row }">
                <img
                  :src="row.skuDefaultImg"
                  alt=""
                  style="width: 100px; height: 100px"
                />
              </template>
            </el-table-column>
          </el-table>
        </el-dialog>
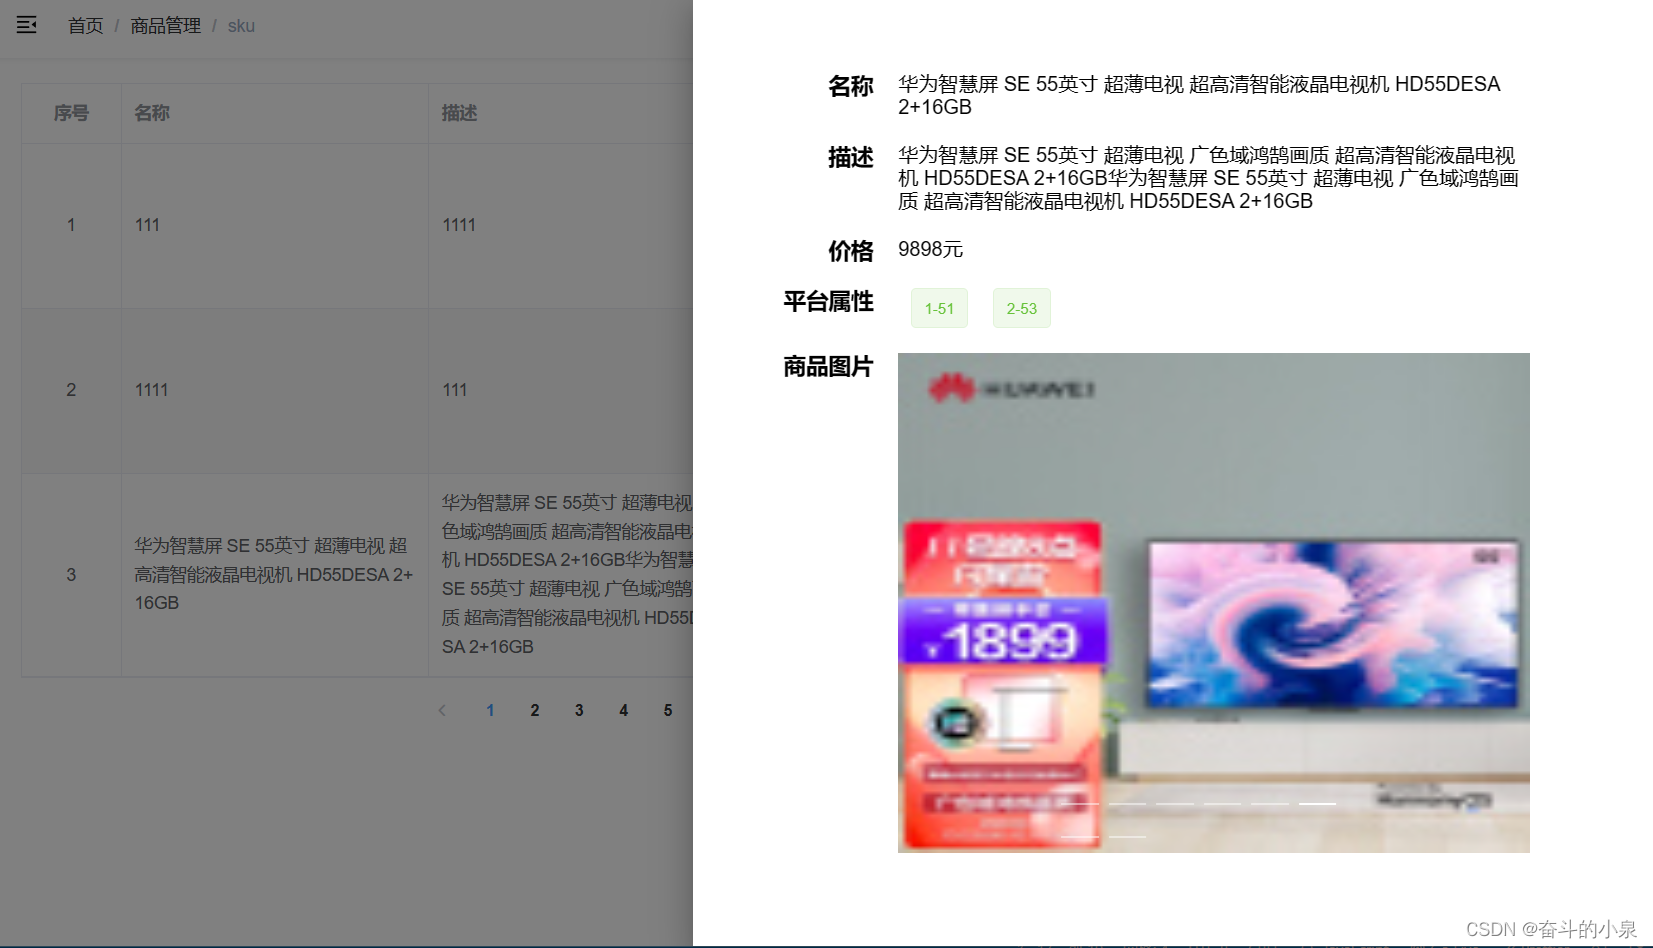
sku模块业务
静态组件:
(运用了element-ui的抽屉组件)
该模块相关接口:
//导入二次封装的axios模块
import request from "@/utils/request"
//请求skulis数据
export const reqskulist = (page, limit) => request({ url: `/admin/product/list/${page}/${limit}`, method: 'get' })
//处理sku上架
export const onsale = (skuId) => request({ url: `/admin/product/onSale/${skuId}`, method: 'get' })
//处理sku下架
export const cancelsale = (skuId) => request({ url: `/admin/product/cancelSale/${skuId}`, method: 'get' })
//删除sku接口
export const deletesku = (skuId) => request({ url: `/admin/product/deleteSku/${skuId}`, method: 'delete' })
//sku详情页
export const getskuinfo = (skuId) => request({ url: `/admin/product/getSkuById/${skuId}`, method: 'get' })
首页
可视化搭建:
效果图:
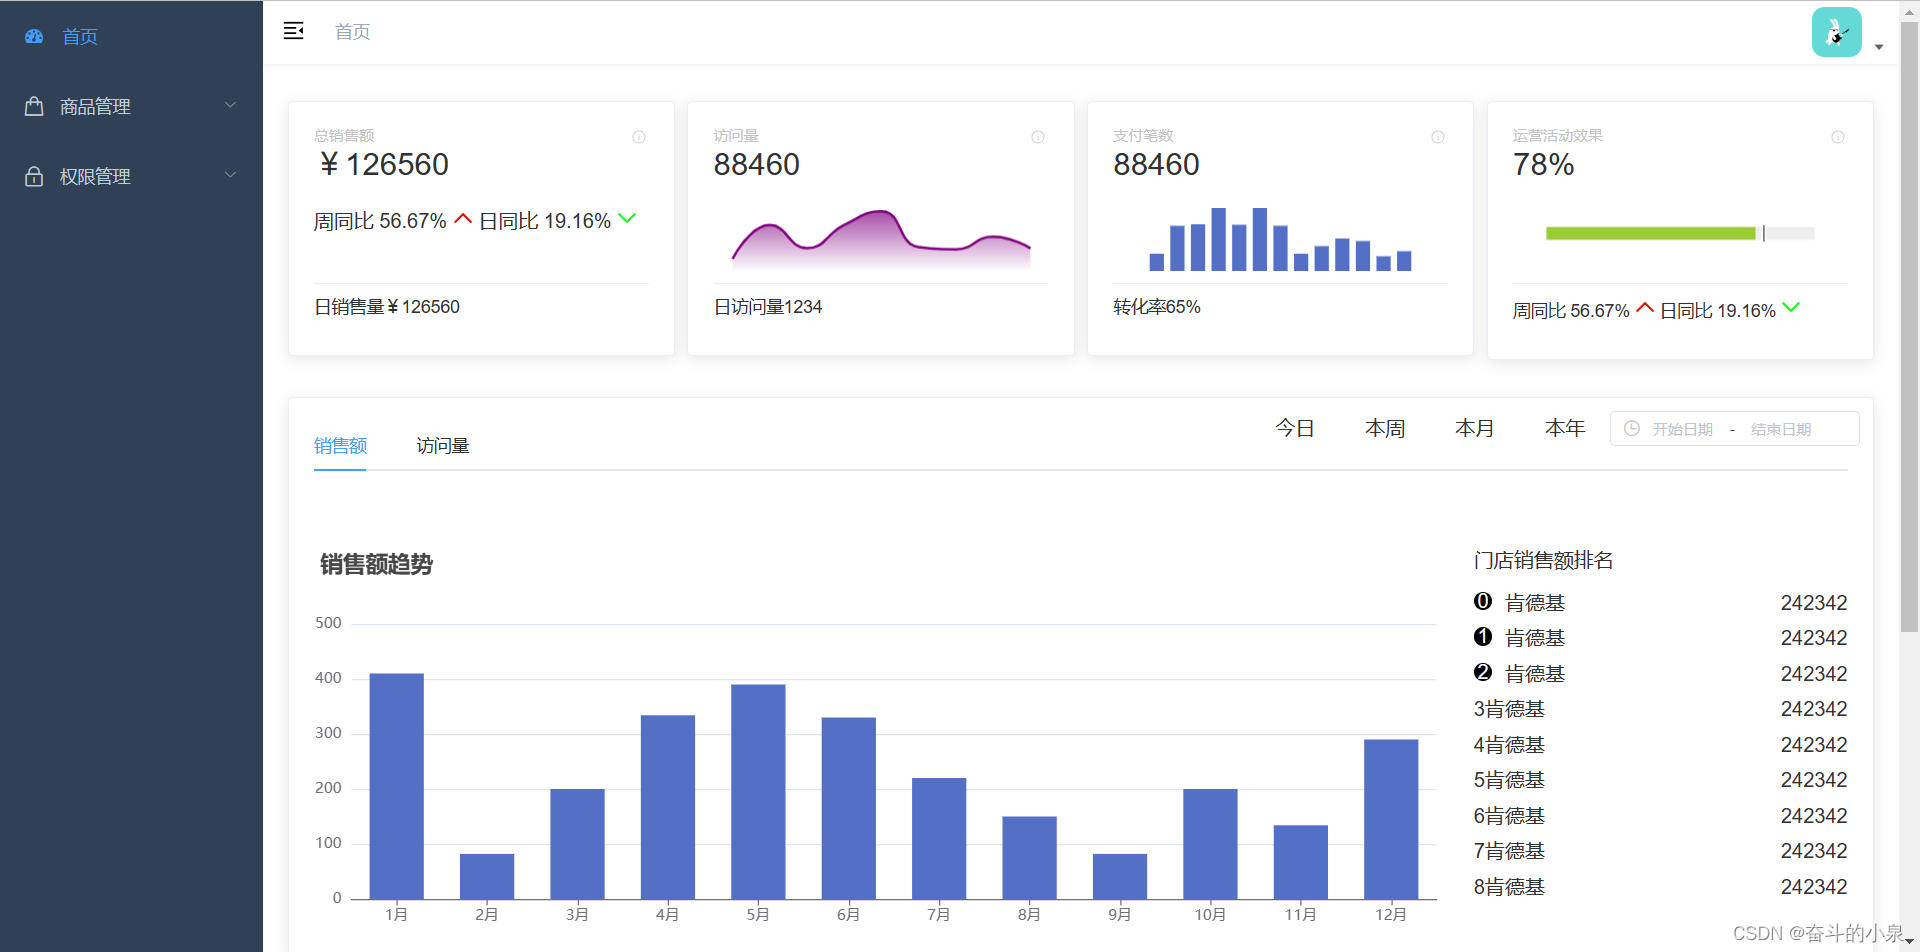
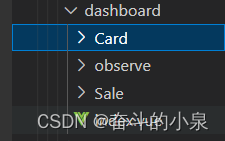
分为card组件,observe组件,sale组件
用mock虚拟数据模拟动态可视化:
第一步:创建(home.js)
data.json(里面包含了一些虚拟数据)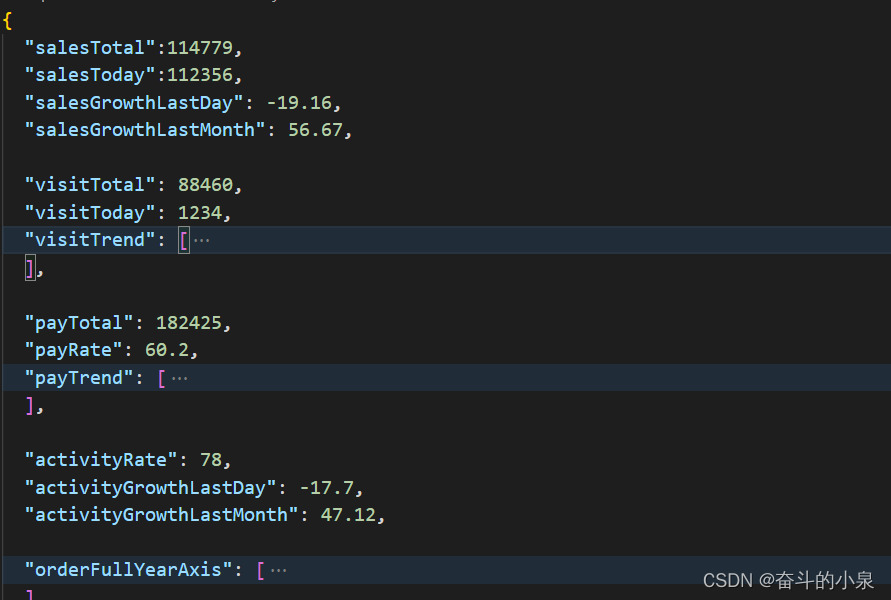
第二步:配置home.js
//data是一个对象
const data = require('./data.json')

module.exports = [
    {
        url: '/home/list',
        type: 'get',
        response: config => {
            const items = data.items
            return {
                code: 20000,
                data
            }
        }
    }
]
第三步:需要在index.js引入home.js
const Mock = require('mockjs')
const { param2Obj } = require('./utils')

const user = require('./user')
const table = require('./table')
const home = require('./home')
const mocks = [
  ...user,
  ...table,
  ...home
]

// for front mock
// please use it cautiously, it will redefine XMLHttpRequest,
// which will cause many of your third-party libraries to be invalidated(like progress event).
function mockXHR() {
  // mock patch
  // https://github.com/nuysoft/Mock/issues/300
  Mock.XHR.prototype.proxy_send = Mock.XHR.prototype.send
  Mock.XHR.prototype.send = function () {
    if (this.custom.xhr) {
      this.custom.xhr.withCredentials = this.withCredentials || false

      if (this.responseType) {
        this.custom.xhr.responseType = this.responseType
      }
    }
    this.proxy_send(...arguments)
  }

  function XHR2ExpressReqWrap(respond) {
    return function (options) {
      let result = null
      if (respond instanceof Function) {
        const { body, type, url } = options
        // https://expressjs.com/en/4x/api.html#req
        result = respond({
          method: type,
          body: JSON.parse(body),
          query: param2Obj(url)
        })
      } else {
        result = respond
      }
      return Mock.mock(result)
    }
  }

  for (const i of mocks) {
    Mock.mock(new RegExp(i.url), i.type || 'get', XHR2ExpressReqWrap(i.response))
  }
}

module.exports = {
  mocks,
  mockXHR
}
第四步:配置vue.config.js

 //开启mock数据
    after: require('./mock/mock-server.js')
第五步:配置store
import mockrequest from "@/utils/mock"
const state = {
    list: []
};
const mutations = {
    GETDATA(state, list) {
        state.list = list
    }
};
const actions = {
    //发送请求mock数据
    async getData({ commit }) {
        let result = await mockrequest.get('/home/list')
        if (result.code === 20000) {
            commit('GETDATA', result.data)
        }
    }
};
const getters = {};


export default {
    state,
    mutations,
    actions,
    getters
}
第六步:
挂载就发请求
  mounted() {
    this.$store.dispatch("getData");
  },
sale.vue
import { mapState } from "vuex";
  computed: {
    title() {
      return this.activeName === "sale" ? "销售额" : "访问量";
    },
    ...mapState({
      liststate: (state) => state.home.list,
    }),
  },


 2864
2864


 暂无认证
暂无认证


 到【灌水乐园】发言


CSDN-Ada助手: Vue入门 技能树或许可以帮到你:https://edu.csdn.net/skill/vue?utm_source=AI_act_vue