从0开始教你三天完成毕业设计-前端之首页

 已于 2022-11-29 19:49:52 修改
 阅读量1.1k
 收藏
21
收藏
21


 点赞数
2
点赞数
2


前言
我这里主要用到了vue+element-ui,大概有不懂的,可以看下面两篇文章深入学习一下
vue
element
Element - The world's most popular Vue UI frameworkElement,一套为开发者、设计师和产品经理准备的基于 Vue 2.0 的桌面端组件库![]() https://element.eleme.cn/#/zh-CN/component/installation
https://element.eleme.cn/#/zh-CN/component/installation
 element里面的话里面有很多一个封装好以及十分美观的组件,大家只需要引入进来就可以,和我一样页面一样美观大气
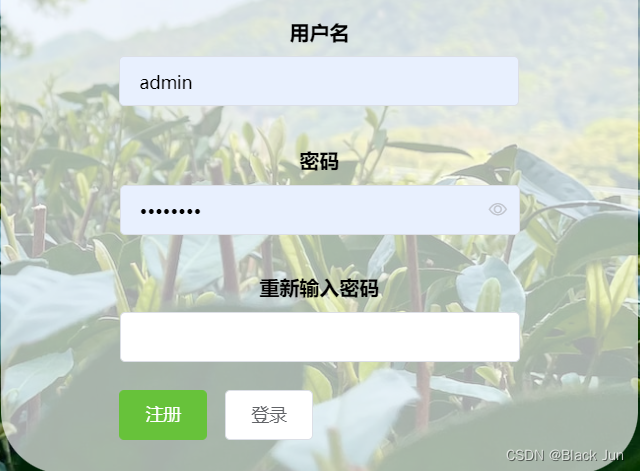
登录/注册
我的登录注册用到了用的是一个界面多用,模板的话是element-ui的el-form,el-form-item,el-input,用的v-if进行监听修改前端展示的是登录或者注册界面

核心代码
<template>
  <div>
    <div style="width:100%;overflow: hidden;background-color: black;" :style="fullHeight">
      <img style="width:100%;" src="@/assets/images/login_background.jpg" alt="背景图片"/>
      <div class="submit" :style="loginStyle" v-if="isLogin" style="  height: 450px;left: -36%">
        <div style="margin-top: 10px;text-align: center">
          <img src="static/logo.svg" alt="头像" style="width:100px;margin-bottom:8px;">
          <div>
            <el-form ref="form" label-position='top'>
              <el-form-item>
                <div style="font-size: 16px;font-weight: bold">用户名</div>
                <el-input style="width:320px" v-model="user.userName"></el-input>
              </el-form-item>
              <el-form-item>
                <div style="font-size: 16px;font-weight: bold">密码</div>
                <el-input style="width:320px" show-password v-model="user.password"></el-input>
              </el-form-item>
              <el-form-item>
                <el-radio v-model="role" label="user"><strong>用户</strong></el-radio>
                <el-radio v-model="role" label="admin"><strong>管理员</strong></el-radio>
              </el-form-item>
            </el-form>
            <div style="text-align: left;position:relative;left: 85px">
              <el-button type="success" @click="login()">登录</el-button>
              <el-button @click="isLogin=false">注册</el-button>
            </div>
          </div>
        </div>
      </div>
      <div class="submit" :style="loginStyle" v-else style="  height: 490px;text-align: center;left: 36%">
        <div style="margin-top: 10px;">
          <img src="static/logo.svg" alt="头像" style="width:100px;margin-bottom:8px;">
        </div>
        <el-form ref="form" label-position='top'>
          <el-form-item>
            <div style="font-size: 16px;font-weight: bold">用户名</div>
            <el-input style="width:320px" v-model="registers.userName"></el-input>
          </el-form-item>
          <el-form-item>
            <div style="font-size: 16px;font-weight: bold">密码</div>
            <el-input style="width:320px" show-password v-model="registers.password1"></el-input>
          </el-form-item>
          <el-form-item>
            <div style="font-size: 16px;font-weight: bold">重新输入密码</div>
            <el-input style="width:320px" show-password v-model="registers.password2"></el-input>
          </el-form-item>
        </el-form>
        <div style="text-align: left;position:relative;left: 85px">
          <el-button type="success" @click="registerUser()">注册</el-button>
          <el-button @click="isLogin=true">登录</el-button>
        </div>
      </div>
    </div>
  </div>
</template>

<script>
import {net_login, net_register} from "../net/before/mine";

export default {
  name: "login",
  data() {
    return {
      fullHeight: '',
      isLogin: true,
      role: "user",
      user: {
        userName: '',
        password: ''
      },
      loginStyle: '',
      registers: {
        userName: '',
        password1: '',
        password2: ''
      }
    }
  },
  methods: {
    //用户登录
    async login() {
      let res = {
        code: "500",
        message: ""
      }
      if (this.user.userName === '') {
        res.message = "用户名为空"
      } else if (this.user.password === '') {
        res.message = "密码为空"
      }
      if (res.message === "") {
        let uploadUser = {
          userName: this.user.userName,
          password: this.user.password
        }
        let res = await net_login(uploadUser);
        if (res.code === "200") {
          if (this.role === "admin") {
            if (res.data.role !== "admin") {
              res = {
                code: "500",
                message: "用户权限不够!"
              }
            } else {
              sessionStorage.setItem("id", res.data.userId);
              sessionStorage.setItem("user", res.data.userName);
              await this.$router.push("/back_home/user");
            }
          } else {
            sessionStorage.setItem("id", res.data.userId);
            await this.$router.push("/home/mine");
          }
        }
        this.$store.commit("tip", res);
        this.user = {
          userName: '',
          password: ''
        }
        this.role = "user";
      } else {
        this.$store.commit("tip", res);
      }
    },
    //用户注册
    async registerUser() {
      let res = {
        code: "500",
        message: ""
      }
      if (this.registers.userName === '') {
        res.message = "用户名为空"
      } else if (this.registers.password1 === '') {
        res.message = "密码为空"
      } else if (this.registers.password1 !== this.registers.password2) {
        res.message = "密码不一致"
      }
      if (res.message === '') {
        let uploadUser = {
          userName: this.registers.userName,
          password: this.registers.password1,
          role: "user",
        }
        let res = await net_register(uploadUser);
        if (res.code === "200") {
          this.isLogin = true;
        }
        this.$store.commit("tip", res);
        this.registers = {
          userName: '',
          password1: '',
          password2: ''
        }
      } else {
        this.$store.commit("tip", res);
      }
    }
  },
  created() {
    this.fullHeight = "height:" + (document.documentElement.clientHeight) + "px";
    sessionStorage.setItem("loading", "true");
  },
  mounted() {
    setTimeout(() => {
      this.loginStyle = "opacity: 1;top:0;"
    }, 10)
  }
}
</script>

<style scoped>
.submit {
  position: fixed;
  transition: all 1.5s;
  opacity: 0;
  top: -80px;
  bottom: 10px;
  right: 0;
  margin: auto;
  background-color: rgba(255, 255, 255, 0.66);
  border-radius: 10%;
  width: 490px;
  z-index: 10;
  padding: 5px 10px;
}
</style>
我的界面
我的界面,这里用的element的插件库库里面的Descriptions
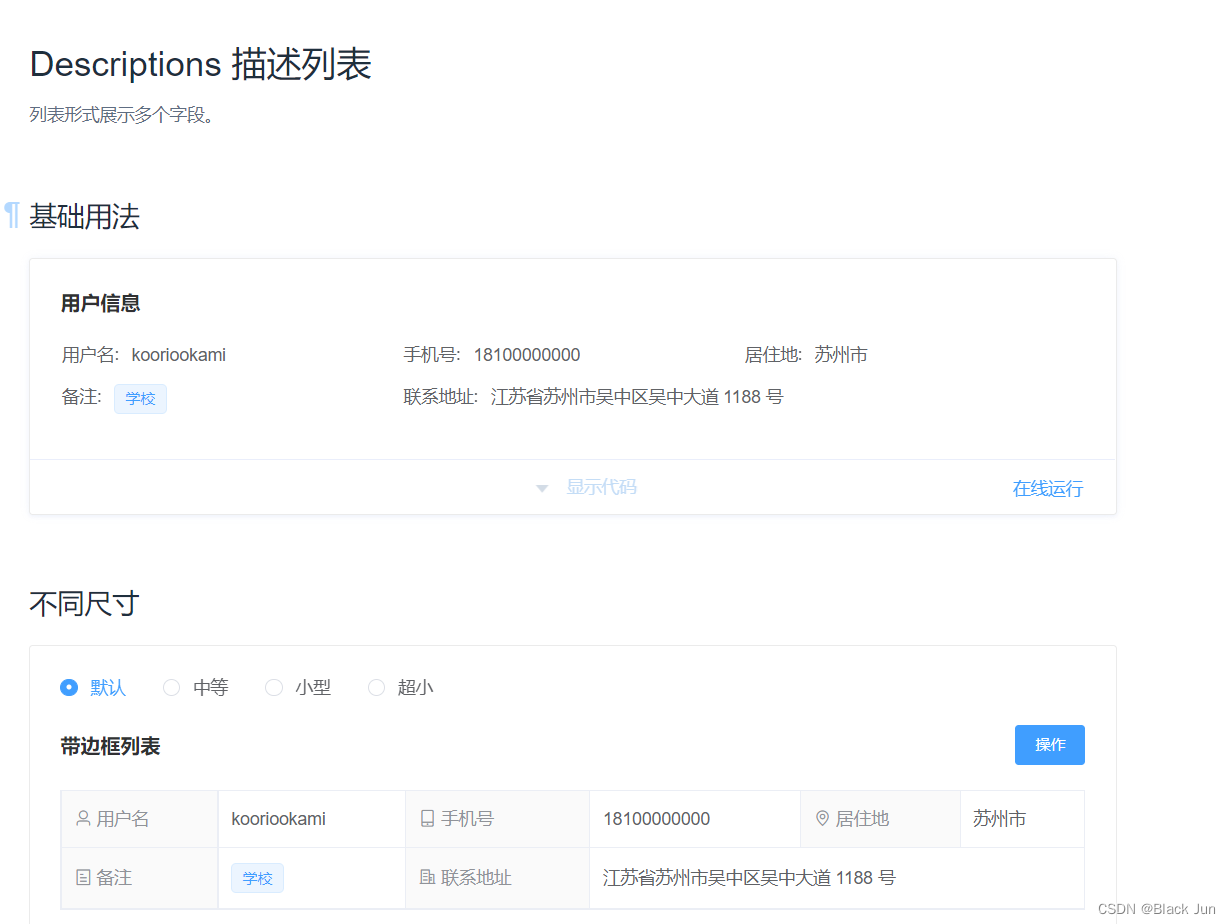
通过之前的axios调用之前的用户信息接口实现,

然后再在自己把用户的 头像展示到最上面,一个最基础的我的界面就完成了
最后,加上退出按钮,让用户登出,我的界面就基本完成了,这个是用element快速的搭建大概架构,同时大家也可以增加一些收藏,修改,充值,订单等功能去丰富里面的内容
核心代码的话,大家可以去了解一下我的这下面的代码
<template> <div style="position:relative;min-height: 600px"> <div style="text-align: center;margin:60px 0;"> <div> <img :src="user.avatar" style="width:210px;border-radius: 50%"/> </div> <div style="margin-top:21px"> <strong style="font-size: 22px;padding:10px 20px;background-color: #62bc3e;border-radius: .6em;color: white">{{ user.userName }}</strong> </div> </div> <div style="width: 65%;margin:30px auto"> <el-menu :default-active="isInfo+''" class="el-menu-demo" mode="horizontal"> <el-menu-item index="1" @click="isInfo='1';getInfo()"><strong>基础信息</strong></el-menu-item> <el-menu-item index="2" @click="isInfo='2';getCollection()"><strong>收藏</strong></el-menu-item> <el-menu-item index="3" @click="isInfo='3';getOrder()"><strong>我的订单</strong></el-menu-item> </el-menu> <div> <div v-if="isInfo==='1'"> <el-descriptions class="margin-top" :column="2" border > <el-descriptions-item> <template slot="label"> <i class="el-icon-user"></i> 用户名 </template> {{ user.userName }} </el-descriptions-item> <el-descriptions-item> <template slot="label"> <i class="el-icon-mobile-phone"></i> 手机号 </template> {{user.phone}} </el-descriptions-item> <el-descriptions-item> <template slot="label"> <i class="el-icon-mobile-phone"></i> 钱包 </template> ¥ {{ user.wallet }} </el-descriptions-item> <el-descriptions-item> <template slot="label"> <i class="el-icon-tickets"></i> 权限 </template> <el-tag size="small">{{ user.role }}</el-tag> </el-descriptions-item> <el-descriptions-item> <template slot="label"> <i class="el-icon-location-outline"></i> 居住地 </template> {{ user.address }} </el-descriptions-item> </el-descriptions> <div style="margin-top: 10px;display: flex;justify-content: right"> <el-button @click="rechargeVisible=true" type="danger">充值</el-button> <el-button icon="el-icon-edit" type="warning" @click="editVisible=true;updBefore()"/> </div> </div> <div v-else-if="isInfo==='2'" style="padding:5px 20px"> <div v-if="collection.length>0"> <large-info v-for="(item,index) in collection" :key="index"> <div slot="category">{{item.categoryName}}</div> <div slot="category">{{ item.category }}</div> <div slot="title">{{ item.goodTitle }}</div> <span slot="content" @click="$router.push({path:'/home/good_info',query:{id:item.goodId}})">{{ item.content.substring(0, 80) }}......</span> <div slot="image"><img :src="item.imgUrl" alt="图片" style="height: 100px;border-radius: 1em"></div> <div slot="bottom" style="font-size: 12px;width: 100%;;margin-top: 5px"> <del>市场价: ¥{{ item.oldPrice }}</del> <span style="margin-left: 10px">现价: <strong style="color: chocolate">¥{{ item.price }}</strong></span> <div style="margin-top: 10px"> 时间:{{item.createTime}} </div> </div> </large-info> </div> <el-empty v-else description="收藏里面啥也没有"/> </div> <div v-else style="padding:10px 20px"> <div v-if="order.length>0"> <large-info v-for="(item,index) in order" :key="index"> <div slot="category">{{item.categoryName}}</div> <div slot="title">{{ item.goodTitle }}</div> <div slot="content" style="display: flex;justify-content: space-between"> <span @click="$router.push({path:'/home/good_info',query:{id:item.goodId}})"> {{item.content.substring(0, 80) }}......</span> <el-button type="info" v-if="item.orderStatus==='0'" @click="tipUser()">提醒发货</el-button> <el-button type="success" v-else-if="item.orderStatus==='1'" @click="changeStatus(item.orderId)">确认收货</el-button> <el-button type="warning" disabled v-else-if="item.orderStatus==='2'">已收货</el-button> </div> <div slot="image"><img :src="item.imgUrl" alt="图片" style="height: 100px;border-radius: 1em"></div> <div slot="bottom" style="font-size: 13px;; width: 100%;"> <div style="display: flex;justify-content: space-between;margin-bottom: 10px"> <span>数量: {{item.number}}</span> <del>市场价: ¥{{ item.oldPrice }}</del> <span>现价: <strong style="color: chocolate">¥{{ item.price }}</strong></span> </div> <div style="display: flex;justify-content: space-between"> <span>成交价: <strong style="color: red">¥{{ item.price }}</strong></span> <span>成交时间: {{ item.createTime }}</span> <span>购买人:{{item.userName}}</span> </div> </div> </large-info> </div> <el-empty v-else description="订单里面啥也没有"/> </div> </div> </div> <div style="position:absolute;top:10px;right: 30px"> <el-button type="danger" @click="exit()"><strong>退出</strong></el-button> </div> <el-dialog title="修改用户" :visible.sync="editVisible" width="40%" center> <el-form> <el-form-item label="用户名" required> <el-input v-model="editParam.userName" readonly onfocus="this.removeAttribute('readonly');"></el-input> </el-form-item> <el-form-item label="密码" required> <el-input v-model="editParam.password" show-password></el-input> </el-form-item> <el-form-item label="手机号" required> <el-input v-model="editParam.phone" type="number"></el-input> </el-form-item> <el-form-item label="地址" required> <el-input v-model="editParam.address"></el-input> </el-form-item> <el-form-item label="头像"> <div> </div> <div style="display: flex"> <div style="margin-right:50px" v-if="editParam.avatar"> <img :src="editParam.avatar" alt="头衔" style="height:100px; border-radius: 10%;"> </div> <el-upload v-if="!isUpload" class="upload-demo" action="#" :on-change="getFile" multiple :limit="1" :auto-upload="false" style="position:relative;top:10px;text-align: center;"> <el-button size="small" type="primary">点击上传</el-button> <div slot="tip" class="el-upload__tip">只能上传jpg/png文件,且不超过500kb</div> </el-upload> </div> </el-form-item> </el-form> <span slot="footer" class="dialog-footer"> <el-button type="info" @click="editVisible=false">取 消</el-button> <el-button type="success" @click="updateUser();editVisible=false">确 定</el-button> </span> </el-dialog> <el-dialog :visible.sync="rechargeVisible" title="充值界面" width="550px" :close-on-click-modal="false" > <div> <el-form> <el-form-item label="充值金额"> <el-input type="number" v-model="rechargePrice"></el-input> </el-form-item> <el-form-item label="请选择充值金额"> <div style="margin:10px 0"> <el-radio-group v-model="rechargePrice"> <el-radio label="0" border>自定义</el-radio> </el-radio-group> </div> <el-radio-group v-model="rechargePrice" > <el-radio-button label="20" border>¥20</el-radio-button> <el-radio-button label="30" border>¥30</el-radio-button> <el-radio-button label="50" border>¥50</el-radio-button> <el-radio-button label="100" border>¥100</el-radio-button> <el-radio-button label="200" border>¥200</el-radio-button> <el-radio-button label="500" border>¥500</el-radio-button> </el-radio-group> </el-form-item> <el-form-item label="所需要支付金额"> <span style="color: #ff5f23">¥{{ rechargePrice }}.0</span> </el-form-item> </el-form> </div> <template #footer> <span class="dialog-footer"> <el-button @click="rechargeVisible = false">取消</el-button> <el-button type="success" @click="rechargeVisible = false;recharge()" :disabled="rechargePrice==='0'"> 确认 </el-button> </span> </template> </el-dialog> </div> </template> <script> import {net_getCollections, net_getOrder, net_info, net_recharge,} from "../../../net/before/mine"; import largeInfo from "../../../components/common/largeInfo"; import {net_selectUser, net_updateUser} from "../../../net/back/user"; import {uploadFile} from "../../../net/back/file"; import {net_changeStatus} from "../../../net/back/order"; export default { name: "mine", components: { largeInfo }, data() { return { user: '', isInfo: '1', collection: '', order: [], editVisible: false, isUpload: false, editParam: { role: '', userName: '', phone: '', address: '', password: '', avatar: '', }, rechargeVisible: false, rechargePrice: '0', } }, methods: { getInfo(){ sessionStorage.setItem("isInfo","1"); }, async getCollection() { sessionStorage.setItem("isInfo","2"); let res = await net_getCollections({userId: sessionStorage.getItem("id")}); this.collection = res.data; }, async getOrder() { sessionStorage.setItem("isInfo","3"); let res = await net_getOrder({userId: sessionStorage.getItem("id")}); this.order = res.data; }, exit() { sessionStorage.clear(); this.$router.push("/login") let res = { code: "200", data: "登出成功!" } this.$store.commit("tip", res); }, async getFile(file) { let data = new FormData(); data.append("file", file.raw); data.append("category", "avatar"); data.append("md5", "1"); let res = (await uploadFile(data)).data; if (res.code === "200") { this.editParam.avatar = res.data.path; this.isUpload = true; } this.$store.commit("tip", res); }, verify() { let res = { code: "500", message: "" }; if (this.editParam.userName === "") { res.message = "用户名字未填写"; } else if (this.editParam.password === "") { res.message = "用户密码未填写"; } else if (this.editParam.role === "") { res.message = "用户权限没有填写" } if (res.message !== "") { this.$store.commit("tip", res); return false; } else { return true; } }, async updBefore() { this.editParam = (await net_selectUser({user_id: sessionStorage.getItem("id")})).data[0]; this.editTitle = this.$route.name + "(修改)"; }, async updateUser() { let res2 = await net_updateUser(this.editParam); this.$store.commit("tip", res2); this.isUpload = true; let res = await net_info({user_id: sessionStorage.getItem("id")}); this.user = res.data[0]; }, async changeStatus(id){ let res = await net_changeStatus({orderId:id,orderStatus:2}); if(res.code==="200"){ await this.getOrder(); } this.$store.commit("tip",res); }, tipUser(){ this.$store.commit("tip",{code:"200",message:"操作成功!"}) }, async recharge(){ let res = await net_recharge({price: this.rechargePrice,userId:sessionStorage.getItem("id")}) this.$store.commit("tip", res); if (res.code === "200") { let res = await net_info({id: sessionStorage.getItem("id")}); this.user = res.data[0]; } } }, async created() { let res = await net_info({id: sessionStorage.getItem("id")}); this.user = res.data[0]; if(sessionStorage.getItem("isInfo")){ this.isInfo=sessionStorage.getItem("isInfo"); } await this.getCollection(); await this.getOrder(); }, } </script> <style scoped> </style>
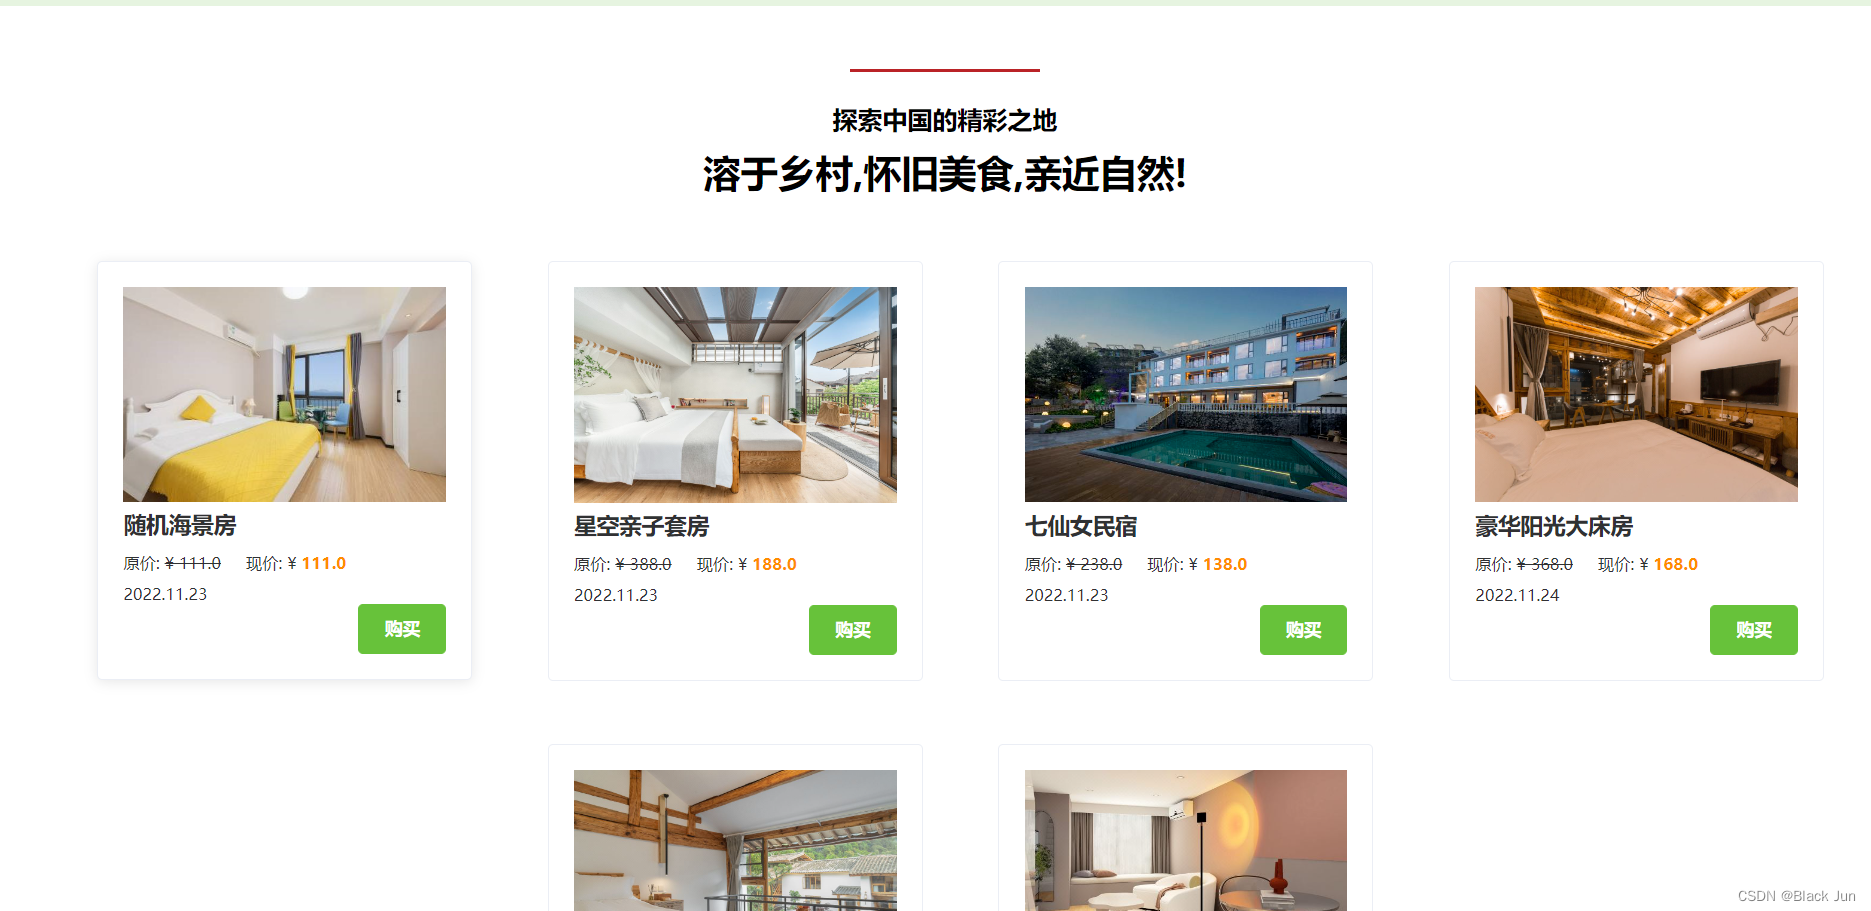
首页
首页的话,大家就各显神通了,每个人的首页都是有不一样的,大家把自己的页面,怎么美观怎么来就行,其实主要还是
这么我主要介绍一下怎么解决内容过少的问题,这边用到element的走马灯(轮播图),
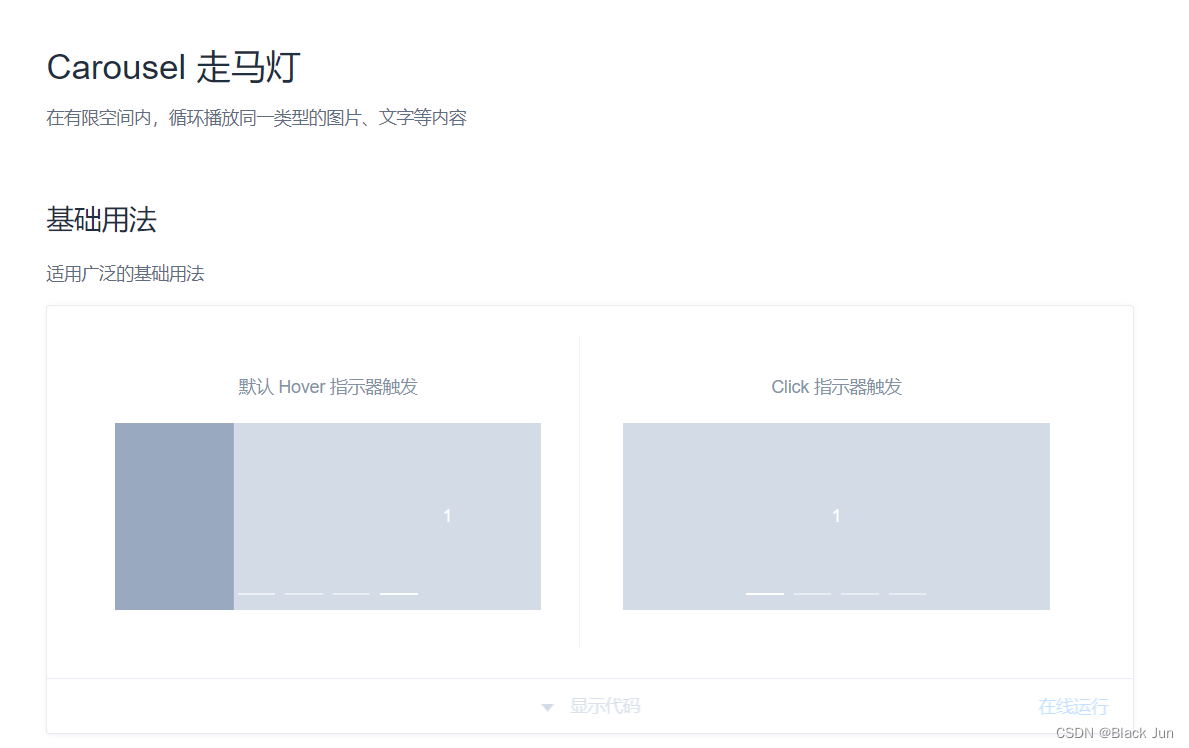
就直接一个简单的大轮播图就可以解决很大的界面空洞的问题,让你的首页看起来,不会太单调,同时,我的界面在随便添加几个模板,把商品的数据展示出来,内容的问题就迎刃而解了,
这里我展示一下自己的网站截图供大家参考

商品页面就直接用v-for把所有商品展示出来就行
这里我给大家提供一下,我无偿分享一下,我已经封装好的商品展示模块,大家只需要引入即可使用
<template>
  <div>
      <el-col style="width:300px"  :offset="1">
        <el-card shadow="hover" style="margin-top: 10px">
          <div style="cursor: pointer">
            <slot name="img"/>
          </div>
          <div style="font-size: 13px;margin-top: 5px">
            <strong style="font-size: 18px"><slot name="title"/></strong>
            <div style="margin-top: 10px"><slot name="other"/></div>
          </div>
        </el-card>
      </el-col>
  </div>
</template>

<script>
export default {
  name: "boxInfo"
}
</script>

<style scoped>
</style>
还有一个是收藏订单等封装好的子模块
<template>
<el-card shadow="never" class="card">
<div style="display: flex">
<div
style="color: white;padding:2px 5px;border-radius: .3em;font-weight: bold;font-size: .9em;background-color: #bb9a6c">
<slot name="category"></slot>
</div>
<h3 style="margin-left: 10px">
<slot name="title"></slot>
</h3>
</div>
<div style="font-size:14px;display: flex;margin-top: 10px">
<div>
<slot name="image"></slot>
</div>
<div style="letter-spacing: 1px;display: flex;justify-content: center;align-items: center;cursor: pointer">
<slot name="content"></slot>
</div>
</div>
<div>
<slot name="bottom"/>
</div>
</el-card>
</template>
<script>
export default {
name: "largeInfo"
}
</script>
<style scoped>
</style>
这样我们基础的两个界面就已经弄好了
展示我的首页代码
<template>
  <div>
    <div style="position: relative">
      <img style="width: 100%;" src="@/assets/images/home/home1.jpg" alt="">
    </div>
    <div style="background-color: rgba(98,188,62,0.16);display: flex;justify-content: space-around">
      <div style="width: 30%;padding-top: 7%;padding-bottom:5%;padding-left: 30px">
        <div style="border-right: 1px solid #d0d0d0">
          <h2 style="font-size: 28px;color: #62bc3e;">Fresh Farmhouse</h2>
          <h2 style="font-size: 23px;color: #353535;margin: 30px 0">味鲜农家乐</h2>
          <p style="font-size: 16px;margin-bottom: 40px">最新消息</p>
          <div class="home-but" @click="$router.push('/home/good')">
            <span>了解更多</span>
          </div>
        </div>
      </div>
      <div class="center-img" style="width: 60%;margin-top: 50px;">
        <div class="center-item">
          <img @click="$router.push({path:'/home/good',query:{id:49}})" style="position: relative;right: 12px;" src="@/assets/images/home/home2.png" alt="">
          <img @click="$router.push({path:'/home/good',query:{id:50}})" src="@/assets/images/home/home3.png" alt="">
          <img @click="$router.push({path:'/home/good',query:{id:45}})" style="position: relative;left: 12px" src="@/assets/images/home/home4.png" alt="">
        </div>
        <div class="center-title">
          <div style="width: 30%">
            <h3 style="margin: 10px 0">美丽的套房卧室,位于梅费尔</h3>
            <p>美丽的套房卧室,位于梅费尔。客房配备齐全,设有双人卧室、衣柜和椅子。 卧室设有独立套内卫生间。客房前面有一个私人露台</p>
          </div>
          <div style="width: 30%">
            <h3 style="margin: 10px 0">舒适双人卧室</h3>
            <p>这间舒适的双人卧室铺设了木地板,装潢品味高雅,共用浴室和卫生间。除了迷你冰箱、水壶外,没有厨房设施。</p>
          </div>
          <div style="width: 30%">
            <h3 style="margin: 10px 0">市内可爱舒适的双人房</h3>
            <p>这处令人惊叹的房源位于国王站和圣潘克拉斯十字站的中心地带。</p>
          </div>
        </div>
      </div>
    </div>
    <div style="margin-top: 30px;font-size: 18px;line-height: 22px;">
      <div style="width: 100%;text-align: center;position: relative;top: 20px">
        <h4 class="main-titles" style="padding: 30px 0 0 0;font-size: 20px">探索中国的精彩之地</h4>
        <h3 class="press-title" style="padding: 20px 0;font-size: 30px">溶于乡村,怀旧美食,亲近自然!</h3>
      </div>
    </div>
    <div style="margin:30px auto;">
      <el-row justify="center" type="flex" style="flex-wrap: wrap">
        <box-info v-for="(item,index) in good" :key="index" style="margin:20px 2%">
          <div slot="img" @click="$router.push({path:'/home/good_info',query:{id:item.goodId}})">
            <img :src="item.imgUrl" style="width: 100%"/>
          </div>
          <div slot="title"
               style="display: inline-block;overflow: hidden;width: 100%;text-overflow:ellipsis;height: 20px;white-space: nowrap">
            {{ item.goodTitle }}
          </div>
          <div slot="other">
            <div style="display: flex;position:relative">
              <div>原价:
                <del>¥ {{ item.oldPrice }}</del>
              </div>
              <div style="margin-left: 20px">现价: ¥ <strong style="color: darkorange;">{{ item.price }}</strong></div>
            </div>
            <div style="margin-top: 10px">
              {{ item.createTime.substring(0, 10).replaceAll("-", ".") }}
            </div>
            <div style="display: flex;justify-content: right;margin-top:0">
              <el-button type="success" style="font-weight: bold"
                         @click="$router.push({path:'/home/good_info',query:{id:item.goodId}})">购买
              </el-button>
            </div>
          </div>
        </box-info>
      </el-row>
    </div>
  </div>
</template>
<script>
import {net_category} from "../../../net/before/home";
import boxInfo from "../../../components/common/boxInfo";
import {net_getGood} from "../../../net/back/goods";
import Swiper from "../../../components/common/Swiper";

export default {
  name: "index",
  components: {
    boxInfo,
    Swiper
  },
  data() {
    return {
      category: '',
      good: '',
      goods: []
    }
  },
  async created() {
    let res2 = await net_category();
    this.category = res2.data.splice(0, 4);
    let result = await net_getGood({});
    this.good = result.data.splice(0, 6);
    this.goods = result.data.splice(0, 4);
  }
}
</script>

<style scoped>
.home-but {
  background-color: #62bc3e;
  color: #fff;
  font-size: 13px;
  width: 160px;
  height: 35px;
  text-align: center;
  line-height: 35px;
  cursor: pointer;
}

.home-but:hover {
  background-color: #0f765e;
}

.center-img img {
  width: 30%;

}

.center-img img:hover,
.tui-img:hover {
  transition: all .3s linear;
  transform: translate3d(0, -2px, 0);
}

.center-item {
  display: inline-flex;
  width: 100%;
  justify-content: space-around;
}
.center-item img{
  cursor: pointer;
}

.center-title {
  display: flex;
  justify-content: space-between;
  text-align: center;
  color: rgba(98, 188, 62, 0.79);
  padding-bottom: 10px;
}

.center-title p {
  line-height: 1.5;
  font-size: 15px;
}
.main-titles::before {
  position: absolute;
  content: "";
  top: 0;
  left: 0;
  right: 0;
  width: 10%;
  height: 3px;
  margin-left: auto;
  margin-right: auto;
  background-color: #ba2327;
  z-index: 1;
}

.main-titles:hover,
.press-title:hover {
  color: #4a4a4a;
}
</style>
下面趁热打铁,我们把商品分类界面也同时搞定
分类界面
分类界面的话,我这里用到了element的导航菜单,当然我的界面也有用到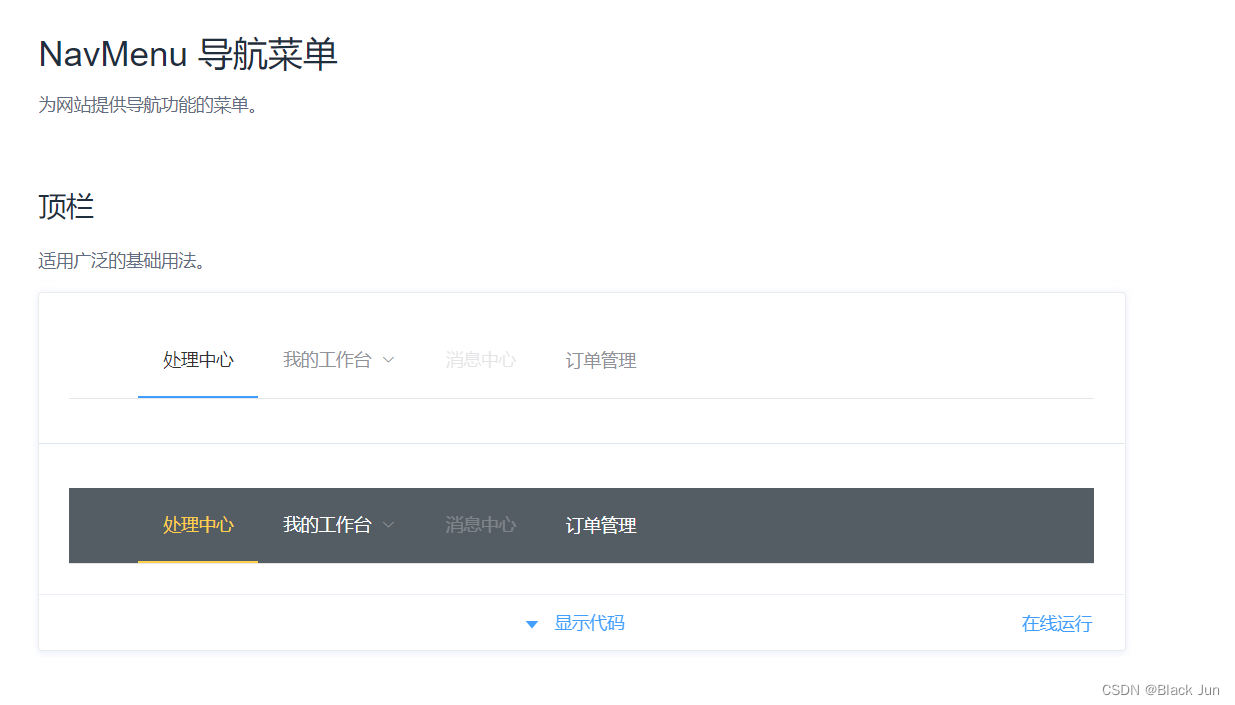
我的界面用到是原始的
分类界面这里需要添加一个参数
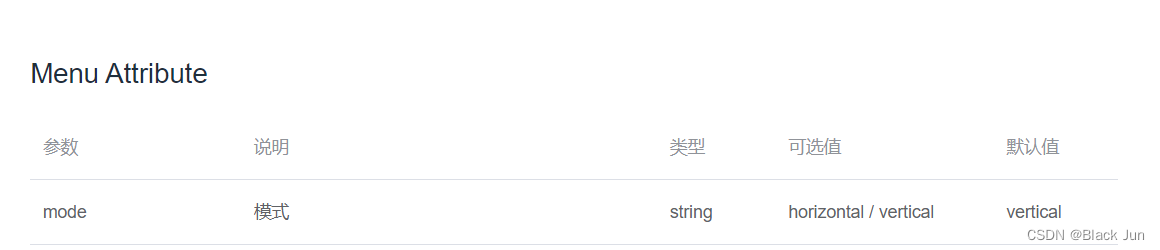
当然大家也可以直接去element官网去找一下,也是有对应模板的,直接复制就好

同时通过点击对应的按钮就去请求对应分类表里面的数据,然后展示到前端即可,
商品的话,大家用我刚刚上面分享的商品模块引入进来后就可以了,
同时商品再加上一个轮播图占位置,我的界面就完成了,
给大家看一下效果图,

以及一些核心代码,大家可以在我的基础上去优化更新
<template>
  <div >
    <el-carousel height="600px" :autoplay="false" type="card">
      <el-carousel-item v-for="(item,index) in swiper" :key="index">
        <img :src="item.imgUrl" style="width:100%;height: 600px;cursor: pointer" @click="$router.push({path:'/home/good_info',query:{id:item.goodId}})" />
      </el-carousel-item>
    </el-carousel>
    <div style="display: flex;margin-top: 20px">
      <div>
        <el-row style="width: 300px;">
          <el-col>
            <h2 style="margin:10px 30px">商品分类</h2>
            <el-menu
              :default-active="active_index+''"
              active-text-color="#62bc3e"
              class="el-menu-vertical-demo">
              <el-menu-item :index="item.categoryIds+''" v-for="(item,index) in category" :key="index"  @click="$router.push({path:'/home/good',query:{id:item.categoryIds}})">
                <i class="el-icon-milk-tea"></i>
                <span slot="title">{{item.categoryName}}</span>
              </el-menu-item>
            </el-menu>
          </el-col>
        </el-row>
      </div>
      <div style="flex: auto;margin:30px 10px">
        <el-row v-if="good.length>0">
          <box-info v-for="(item,index) in good" :key="index" >
            <div slot="img" @click="$router.push({path:'/home/good_info',query:{id:item.goodId}})">
              <img :src="item.imgUrl" style="width:100%;height: 193px"/>
            </div>
            <div slot="title"
                 style="display: inline-block;overflow: hidden;width: 100%;text-overflow:ellipsis;height: 20px;white-space: nowrap">
              {{item.goodTitle}}
            </div>
            <div slot="other">
              <div style="display: flex">
                <div>原价: <del>¥ {{item.oldPrice}}</del></div>
                <div style="margin-left: 20px">现价: ¥ <strong style="color: darkorange;">{{item.price}}</strong></div>
              </div>
              <div style="margin-top: 10px">
                {{item.createTime.substring(0,10).replaceAll("-",".")}}
              </div>
              <div style="display: flex;justify-content: right;">
                <el-button type="success" style="font-weight: bold" @click="$router.push({path:'/home/good_info',query:{id:item.goodId}})">购买</el-button>
              </div>
            </div>
          </box-info>
        </el-row>
        <el-empty description="分类下啥也没有" v-else></el-empty>
      </div>
    </div>
  </div>
</template>

<script>

import {net_category} from "../../../net/before/home";
import {net_getCategoryProperty} from "../../../net/before/property";
import boxInfo from "../../../components/common/boxInfo";
import {net_swiper} from "../../../net/back/home";

export default {
  name: "good",
  components:{
    boxInfo
  },
  data() {
    return {
      good: [],
      swiper: [],
      category:[],
      active_index:"1"
    }
  },
  watch: {
    '$route.query.id': async function (newData, oldData) {
      this.active_index=newData;
      await this.getCategoryProperty(newData);
    }
  },
  methods: {
    async getCategoryProperty(id) {
      let res = await net_getCategoryProperty({categoryIds: id})
      this.good = res.data;
    }
  },
  async created() {
    this.category=(await net_category()).data
    await this.getCategoryProperty(this.$route.query.id);
    this.swiper=(await net_swiper()).data
  }
}
</script>

<style scoped>

</style>
同时我的界面有了,商品点击进去还是一片空白
所以我们需要弄一个商品详情界面
商品详情界面
商品详情界面的话,无非就是一些商品的展示以及商品的价格,简介,还有购买等功能,这里就没啥好说的一个img,一个el-button就可以解决
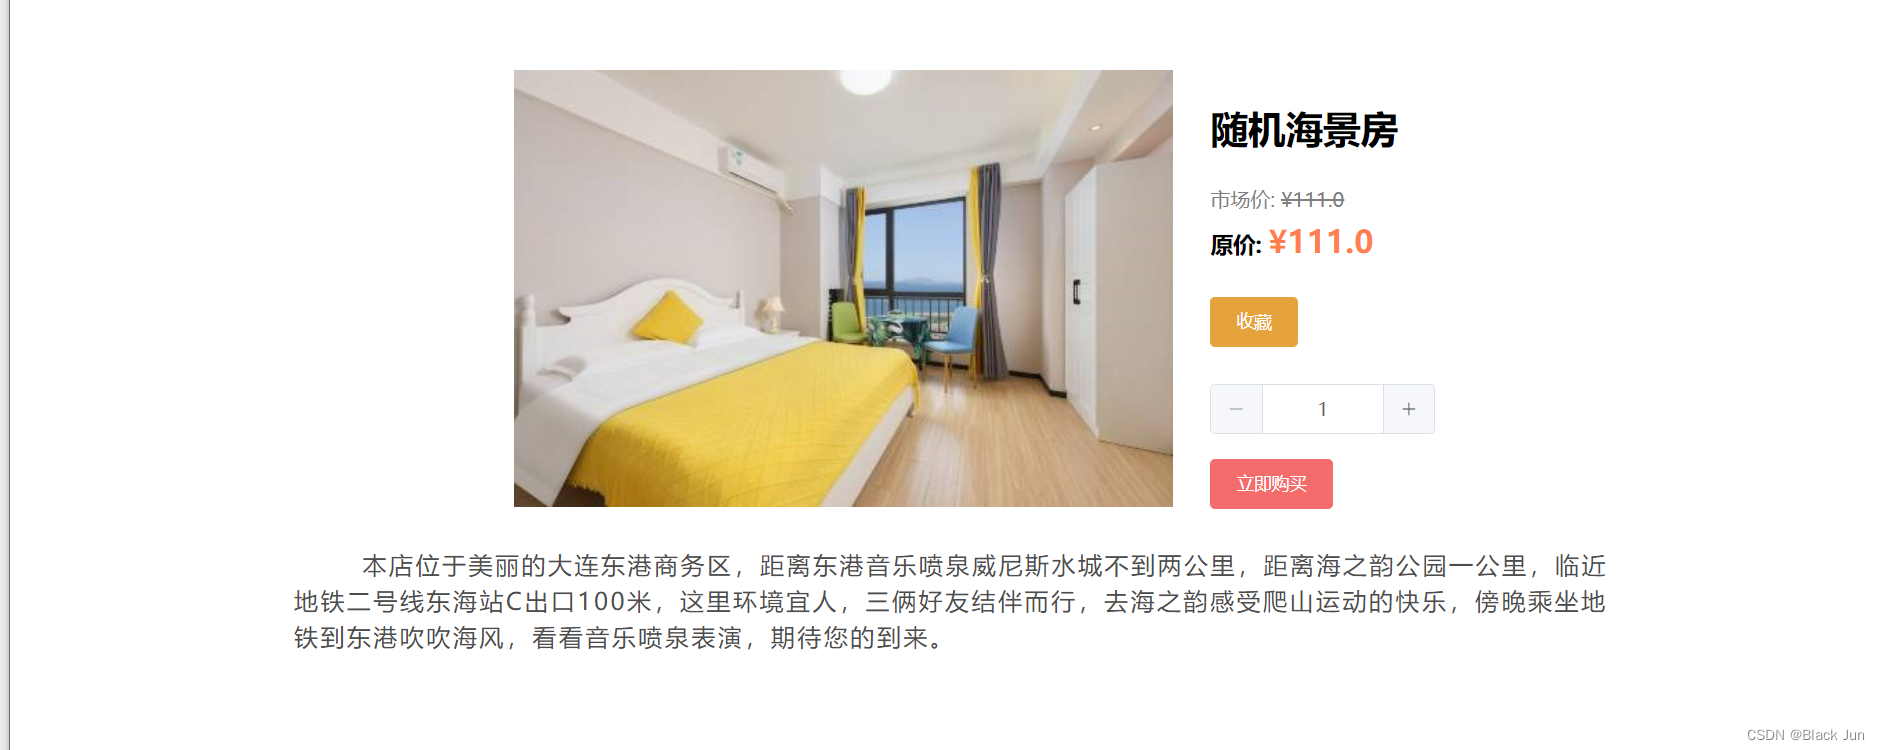
大家有能力的话,也可以添加一个收藏按钮,把收藏功能对接上去就行,
<template>
<div style="width:70%;margin:30px auto;min-height: 700px">
<div style="display: flex;margin:30px 20px 30px 50px;justify-content: center">
<img :src="goodInfo.imgUrl" style="height: 350px;">
<div style="margin-left: 30px">
<div style="margin:30px 0">
<strong style="font-size: 30px">
<slot name="title"/>
{{ goodInfo.goodTitle }}</strong>
</div>
<div style="color:grey">市场价:
<del>¥{{ goodInfo.oldPrice }}</del>
</div>
<div style="font-weight: bold;margin-top: 10px;font-size: 18px">原价: <span
style="color: coral;font-size: 25px">¥{{ goodInfo.price }}</span></div>
<div style="margin-top: 30px">
<el-button type="warning" @click="add_collection()">收藏</el-button>
</div>
<div style="margin-top: 30px">
<el-input-number v-model="number"/>
</div>
<div style="margin-top: 20px">
<el-button type="danger" @click="beforePay()">立即购买</el-button>
</div>
</div>
</div>
<div style="margin-top:30px;letter-spacing: 2px;font-size: 1.2em;line-height: 1.5em;color: #4d4d4d"
v-if="goodInfo">
<p v-html='goodInfo.content.replaceAll("。", "。<br/>  ")' style="text-indent: 55px"></p>
</div>
<el-dialog
title="支付接口"
:visible.sync="payVisible"
width="40%"
center>
<el-form>
<el-form-item label="钱包余额">
<span style="font-weight: bold;color: coral">¥{{ wallet }}</span>
</el-form-item>
<el-form-item label="商品价">
<span style="font-weight: bold;color: red">-¥{{ goodInfo.price }} x {{number}}</span>
</el-form-item>
<el-form-item label="余额">
<span style="font-weight: bold;color: chocolate">¥{{
parseFloat(wallet) - (parseFloat(goodInfo.price)*number)
}}</span>
<strong
style="margin-left: 30px;color: #f4b023">{{
parseFloat(wallet) - (parseFloat(goodInfo.price)*number) >= 0 ? "钱包余额能购买" : "余额不够.请联系管理员充值!"
}}</strong>
</el-form-item>
<el-form-item>
<img :src="this.goodInfo.imgUrl" style="height: 50px"/>
</el-form-item>
<div style="display: flex;justify-content: right">
<el-button type="info" @click="payVisible=false">取 消</el-button>
<el-button type="danger" @click="pay(parseFloat(wallet)-parseFloat(goodInfo.price))"
:disabled="parseFloat(wallet) - (parseFloat(goodInfo.price)*number)<0">确 定
</el-button>
</div>
</el-form>
</el-dialog>
</div>
</template>
<script>
import {net_selectUser} from "../../../net/back/user";
import {net_pay} from "../../../net/before/mine";
import {net_addCollection, net_getCategoryProperty} from "../../../net/before/property";
export default {
name: "goodInfo",
data() {
return {
goodInfo: '',
payVisible: false,
wallet: 0,
number:1,
}
},
methods: {
async beforePay() {
if (sessionStorage.getItem("id")) {
let res = await net_selectUser({userId: sessionStorage.getItem("id")})
this.wallet = res.data[0].wallet;
this.payVisible = true;
} else {
let res = {
code: "500",
message: "请先登录!"
}
await this.$router.push("/login");
this.$store.commit("tip", res);
}
},
async pay(wallet) {
let res = await net_pay({userId: sessionStorage.getItem("id"), wallet: wallet,goodId:this.goodInfo.goodId,number:this.number});
this.$store.commit("tip", res);
this.payVisible = false;
await this.$router.push("/home/mine");
},
async add_collection() {
if(sessionStorage.getItem("id")) {
let res = await net_addCollection({userId: sessionStorage.getItem("id"), goodId: this.goodInfo.goodId})
if (res.code !== "200") {
res = {
code: "500",
message: "请勿重复收藏!"
}
}
this.$store.commit("tip", res);
}else{
let res = {
code: "500",
message: "请先登录!"
}
await this.$router.push("/login");
this.$store.commit("tip", res);
}
},
},
async created() {
let res = await net_getCategoryProperty({goodId: this.$route.query.id});
this.goodInfo = res.data[0];
}
}
</script>
<style scoped>
</style>
值得注意的是,详细内容的话,我用到了replaceAll(),把句号,空格等换成/n换行符,这样详细内容,就会看起来层次分明起来
<p v-html='goodInfo.content.replaceAll("。", "。<br/>  ")' style="text-indent: 55px"></p>这样加上一些其他的事件以及支付接口我们这个商品详情页面就解决了,
同上,附上自己的代码
<template>
<div style="width:70%;margin:30px auto;min-height: 700px">
<div style="display: flex;margin:30px 20px 30px 50px;justify-content: center">
<img :src="goodInfo.imgUrl" style="height: 350px;">
<div style="margin-left: 30px">
<div style="margin:30px 0">
<strong style="font-size: 30px">
<slot name="title"/>
{{ goodInfo.goodTitle }}</strong>
</div>
<div style="color:grey">市场价:
<del>¥{{ goodInfo.oldPrice }}</del>
</div>
<div style="font-weight: bold;margin-top: 10px;font-size: 18px">原价: <span
style="color: coral;font-size: 25px">¥{{ goodInfo.price }}</span></div>
<div style="margin-top: 30px">
<el-button type="warning" @click="add_collection()">收藏</el-button>
</div>
<div style="margin-top: 30px">
<el-input-number v-model="number"/>
</div>
<div style="margin-top: 20px">
<el-button type="danger" @click="beforePay()">立即购买</el-button>
</div>
</div>
</div>
<div style="margin-top:30px;letter-spacing: 2px;font-size: 1.2em;line-height: 1.5em;color: #4d4d4d"
v-if="goodInfo">
<p v-html='goodInfo.content.replaceAll("。", "。<br/>  ")' style="text-indent: 55px"></p>
</div>
<el-dialog
title="支付接口"
:visible.sync="payVisible"
width="40%"
center>
<el-form>
<el-form-item label="钱包余额">
<span style="font-weight: bold;color: coral">¥{{ wallet }}</span>
</el-form-item>
<el-form-item label="商品价">
<span style="font-weight: bold;color: red">-¥{{ goodInfo.price }} x {{number}}</span>
</el-form-item>
<el-form-item label="余额">
<span style="font-weight: bold;color: chocolate">¥{{
parseFloat(wallet) - (parseFloat(goodInfo.price)*number)
}}</span>
<strong
style="margin-left: 30px;color: #f4b023">{{
parseFloat(wallet) - (parseFloat(goodInfo.price)*number) >= 0 ? "钱包余额能购买" : "余额不够.请联系管理员充值!"
}}</strong>
</el-form-item>
<el-form-item>
<img :src="this.goodInfo.imgUrl" style="height: 50px"/>
</el-form-item>
<div style="display: flex;justify-content: right">
<el-button type="info" @click="payVisible=false">取 消</el-button>
<el-button type="danger" @click="pay(parseFloat(wallet)-parseFloat(goodInfo.price))"
:disabled="parseFloat(wallet) - (parseFloat(goodInfo.price)*number)<0">确 定
</el-button>
</div>
</el-form>
</el-dialog>
</div>
</template>
<script>
import {net_selectUser} from "../../../net/back/user";
import {net_pay} from "../../../net/before/mine";
import {net_addCollection, net_getCategoryProperty} from "../../../net/before/property";
export default {
name: "goodInfo",
data() {
return {
goodInfo: '',
payVisible: false,
wallet: 0,
number:1,
}
},
methods: {
async beforePay() {
if (sessionStorage.getItem("id")) {
let res = await net_selectUser({userId: sessionStorage.getItem("id")})
this.wallet = res.data[0].wallet;
this.payVisible = true;
} else {
let res = {
code: "500",
message: "请先登录!"
}
await this.$router.push("/login");
this.$store.commit("tip", res);
}
},
async pay(wallet) {
let res = await net_pay({userId: sessionStorage.getItem("id"), wallet: wallet,goodId:this.goodInfo.goodId,number:this.number});
this.$store.commit("tip", res);
this.payVisible = false;
await this.$router.push("/home/mine");
},
async add_collection() {
if(sessionStorage.getItem("id")) {
let res = await net_addCollection({userId: sessionStorage.getItem("id"), goodId: this.goodInfo.goodId})
if (res.code !== "200") {
res = {
code: "500",
message: "请勿重复收藏!"
}
}
this.$store.commit("tip", res);
}else{
let res = {
code: "500",
message: "请先登录!"
}
await this.$router.push("/login");
this.$store.commit("tip", res);
}
},
},
async created() {
let res = await net_getCategoryProperty({goodId: this.$route.query.id});
this.goodInfo = res.data[0];
}
}
</script>
<style scoped>
</style>
网站简介
这个就没啥好说的,最简单的形式就是一个logo,然后用p标签text-indent:2em 做出段落换行效果,同时把网站内容写入就可以了,这个没啥好说,当然大家可以进行适当的优化一下,做得美观一点
还是附上自己的代码
<template>
  <div style="padding: 30px 0;width:90%;margin:30px auto;min-height: 600px">
    <h3 style="text-align: center">公司简介</h3>
    <div style="margin-top: 20px;font-size: 18px;line-height: 30px;">
      <div style="text-align: center">
        <img src="static/logo.svg" style="width: 200px">
      </div>
      <div style="margin:50px auto;width: 65%;">
        <p style="text-indent: 2em;">
          农家乐是新兴的旅游休闲形式,一种回归自然从而获得身心放松、愉悦精神的休闲旅游方式。一般来说,农家乐的业主利用当地的农产品进行加工,满足客人的需要,成本较低,因此消费就不高。而且农家乐周围一般都是美丽的自然或田园风光,空气清新,环境放松,可以舒缓现代人的精神压力,因此受到很多城市人群的喜爱。
        </p>
        <p style="text-indent: 2em;">
          乡村旅游在国外已有30多年的历史,开展得比较成功的,大部分是一些欧美发达国家。20世纪60年代初,当时的旅游大国西班牙把乡村的城堡进行一定的装修改造成为饭店,用以留宿过往客人,这种饭店称为“帕莱多国营客栈”;同时,把大农场、庄园进行规划建设,提供徒步旅游、骑马、滑翔、登山、漂流、参加农事活动等项目,从而开创了世界乡村旅游的先河。以后,乡村旅游在美国、法国、波兰、日本等国家得到倡导和大发展。1996年,美国农村客栈总收入为40亿美元。1997年,美国有1800万人前往乡村、农场度假,仅在美国东部便有1500个观光农场,在西部还有为数众多的专门用于旅游的牧场。法国有1.6万多户农家建立了家庭旅馆,推出农庄旅游,全国33%的游人选择了乡村度假,乡村旅游每年接待游客200万,能给农民带来700亿法郎的收入,相当于全国旅游收入的1/4。在欧美国家,乡村旅游已具有相当规模,并已走上了规范化发展的轨道,显示出极强的生命力和巨大的发展潜力
        </p>
      </div>

    </div>
  </div>
</template>

<script>
export default {
  name: "press"
}
</script>

<style scoped>
.main-titles::before {
  position: absolute;
  content: "";
  top: 0;
  left: 0;
  right: 0;
  width: 10%;
  height: 3px;
  margin-left: auto;
  margin-right: auto;
  background-color: #ba2327;
  z-index: 1;
}

.main-titles:hover,
.press-title:hover {
  color: #4a4a4a;
}

.press-item {
  display: flex;
  justify-content: space-between;
}

.press-item div {
  width: 30%;
}

.press-item img {
  width: 100%;
  border-radius: 10px;
}

.press-item img:hover {
  transition: all .3s linear;
  transform: translate3d(0, -2px, 0);
}
</style>
接口封装
当然,前端还是需要接口对接数据的,不然静态页面还是不行的,这里我把axios封装一下,到时候对接一下就可以
import axios from "axios";
import store from "@/store/index";

const instance=axios.create({
    baseURL:'http://localhost:8088/',
    method:'post',
    timeout:10000
})

  instance.interceptors.request.use(config=>{
    const token = sessionStorage.getItem("token");
    store.state.loading=true;
    return config;
  },error => {
    let res={
      code:"500",
      message:"服务器出现问题,请联系管理员"
    }
    store.commit("tip",res);
    store.state.loading=false;
  })

  instance.interceptors.response.use(res=>{
    store.state.loading=false;
    return res.data;
  },error => {
    let res={
      code:"500",
      message:"服务器出现问题,请联系管理员"
    }
    store.commit("tip",res);
    store.state.loading=false;
  })

export default instance;
baseURL:后面是后端的访问地址
其他的是请求拦截和响应拦截,大家可以按需修改
Vuex-操作提醒
后面就是加一个操作提醒,用户进行修改,新增,删除操作时新增一个用户提醒,同样用的是element的插件库

import Vuex from "vuex";
import Vue from "vue";
import { Notification } from 'element-ui';
Vue.use(Vuex);


export default new Vuex.Store({
  state: {
    loading:false,
  },
  mutations: {
    tip(state,res) {
      if (res.code === "200") {
        if((typeof res.data)==="string"){
          Notification({
            title: "成功",
            message: res.data,
            type: 'success'
          });
        }else{
          Notification({
            title: "成功",
            message: "操作成功!",
            type: 'success'
          });
        }
      } else {
        Notification({
          title: "出现问题",
          message: res.message,
          type: 'warning'
        });
      }
    }
  }
})
大家调用的话,如下图所示就行
this.$store.commit("tip",{code:"200",message:"操作成功!"})后面的话大家只需要整合一下就可以了
主题所有文章已经更新欢迎大家,留言评论
从0开始教你三天完成毕业设计-项目设计_Black Jun的博客-CSDN博客作为一个初学java的小萌新,用java的springboot框架一时间加急写出来一个项目的话还是有难度的,当然mbatis-plus的代码生成器是可以的,但是比较晦涩难懂,加上配置的问题,所以我这里就不推荐用java,听说php停简单的,因此,为了完成这篇文章我特意花了半天学完了php的phpthink框架,这个项目我们用前后端分离的模式,毕竟冗杂的时代已经快过去了,追上时代潮流,才能成为让老师眼前一亮的毕业设计.https://blog.csdn.net/BlackjunPJH/article/details/127064484?spm=1001.2014.3001.5502
从0开始教你三天完成毕业设计-后端api_Black Jun的博客-CSDN博客_后端毕业设计经过前面的文档,我们已经完成了设计阶段和环境配置,如果没有的话,可以先去浏览这篇文章这篇文章,我们来教大家thinkphp后端api接口书写https://blog.csdn.net/BlackjunPJH/article/details/127084314?spm=1001.2014.3001.5502
从0开始教你三天完成毕业设计-前端之首页_Black Jun的博客-CSDN博客我这里主要用到了vue+element-ui,大概有不懂的,可以看下面https://blog.csdn.net/BlackjunPJH/article/details/128098608
从0开始教你三天完成毕业设计-前端之后台管理_Black Jun的博客-CSDN博客同理的话,我们还是用vue+element有不懂的话,可以看看前面两篇文章,上面有vue以及element的介绍,这里的话我们还是element的表格插件,同时后台管理界面无非就是一个crud,增删改查所以我这里就用一个界面进行举例说明。https://blog.csdn.net/BlackjunPJH/article/details/128103279?spm=1001.2014.3001.5502


 1201
1201


 暂无认证
暂无认证


 到【灌水乐园】发言


想吃麦当劳mmm: 你好,这个链接失效了,可以重新发一下吗,谢谢你
weixin_40707587: [code=html] <script> document.querySelector('input').addEventListener('change',(e) => { console.dir(e.target.files[0]) const form = new FormData() form.append = e.target.files[0] axios({ url: 'https://blackjun.cn/wander/fileUtils', method: 'POST', data:form }).then(result => { console.log(result) }) }) </script> [/code]
weixin_40707587: 返回404啊 兄弟
CSDN-Ada助手: 恭喜您成功完善了mbatis-plus一键生成工具,一键生成CRUD,这是一项非常不错的创新!您的不断创作和完善,让我们看到了一个充满活力和创意的开发者。接下来,建议您可以继续深入研究此工具,探索更多的功能和优化。期待您的下一篇博客! CSDN 会根据你创作的博客的质量,给予优秀的博主博客红包奖励。请关注 https://bbs.csdn.net/forums/csdnnews?typeId=116148&utm_source=csdn_ai_ada_blog_reply8 看奖励名单。
CSDN-Ada助手: 非常感谢用户的分享,标题十分吸引人!恭喜你成功完成第9篇博客,希望你能继续保持创作的热情和动力。接下来,建议你可以尝试挑战一些更具深度和难度的话题,为读者带来更有价值的内容。同时也期待你能够在未来的创作中,更加注重细节和完善性,让读者获得更好的阅读体验。再次感谢你的分享,期待你的下一篇精彩博客! CSDN 会根据你创作的博客的质量,给予优秀的博主博客红包奖励。请关注 https://bbs.csdn.net/forums/csdnnews?typeId=116148&utm_source=csdn_ai_ada_blog_reply9 看奖励名单。